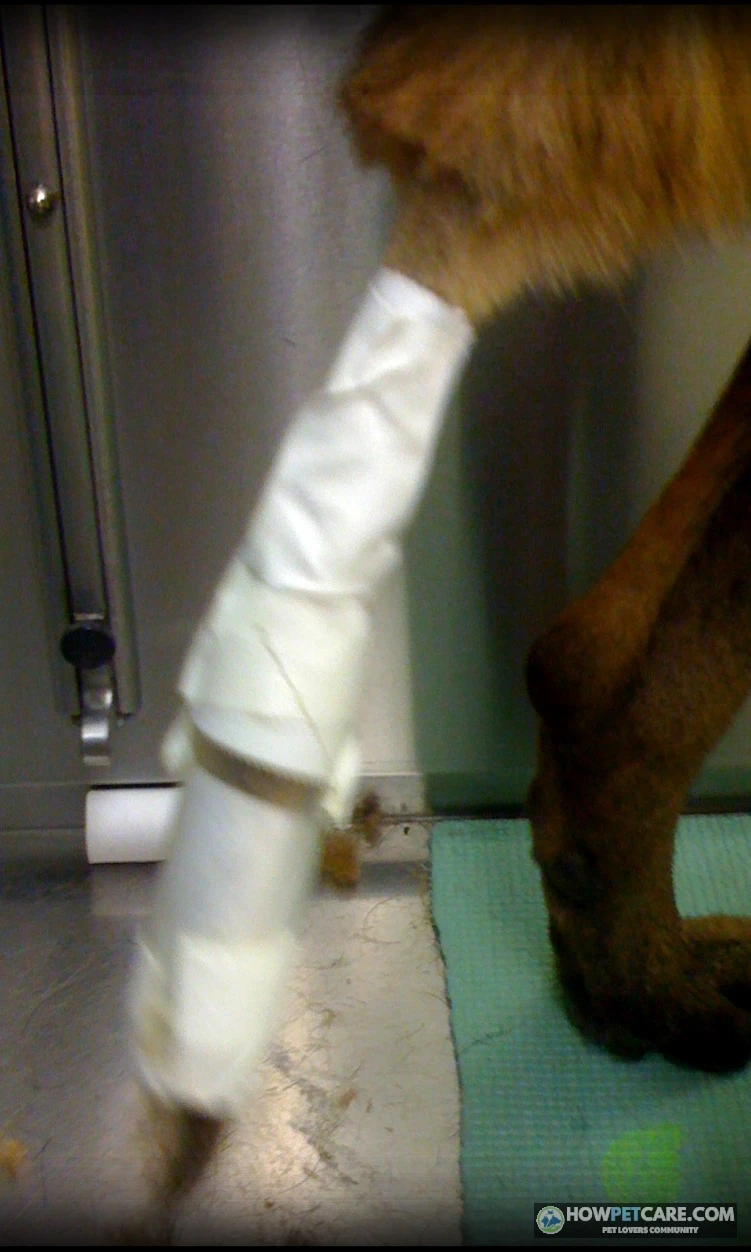

Happy tail syndrome is a recurring tail-tip injury in dogs, caused when vigorous wagging repeatedly strikes walls, doorways, furniture, or crate bars. Each impact cracks or reopens the skin, so the wound bleeds again and won’t heal until the tail is protected from further collisions.
Blood on the walls? Triage a suspected happy tail injury now
If your dog has a small, superficial tail-tip wound and the bleeding stops after 10–15 minutes of steady pressure, you can protect it briefly while you arrange veterinary advice. A deep split, bleeding that won’t stop, signs of infection, or a wound that keeps reopening needs a vet’s attention — not another round of improvised wrapping.
Home monitoring versus a vet visit today
| Finding | Recommended action | Why it matters |
|---|---|---|
| Bleeding stops after 10–15 minutes of steady pressure; the wound looks small and superficial; your dog is otherwise acting normally | Protect it and monitor briefly; contact your veterinarian for advice if it reopens | A minor wound may heal if it stays protected, but the tail tip is easy to reinjure |
| Bleeding continues or restarts after 10–15 minutes of uninterrupted firm pressure | Seek same-day veterinary care | Ongoing bleeding may indicate a deeper wound or one that won’t seal on its own |
| Wound is deep, gaping, or split, or you can see tissue beneath the skin | Seek veterinary care today; use an emergency clinic if your regular clinic is unavailable | Deep wounds may need professional treatment, not a home wrap |
| Increasing redness, swelling, warmth, discharge, or foul odor | Contact a veterinarian promptly, ideally the same day if worsening | These can indicate infection or a wound that is deteriorating |
| Your dog is lethargic, painful, stops eating, or seems unwell | Seek same-day veterinary care | Whole-body changes raise concern beyond a small surface wound |
| The wound repeatedly reopens when your dog wags | Arrange a veterinary examination | Repeated impact can prevent healing even when each episode looks minor |
For first aid, keep your dog calm and have someone help hold them gently. Place clean gauze over the wound and apply steady pressure without repeatedly lifting it to check. Once bleeding is controlled, rinse surface debris with sterile saline or clean water. Prevent licking or chewing, and arrange veterinary advice if you’re unsure how deep the wound is.
Don’t use hydrogen peroxide or alcohol on the wound; these can irritate tissue. Don’t improvise a tourniquet or wrap the tail tightly. Avoid human pain medicines, and don’t apply medication unless a veterinarian has advised you to use it.
First aid for a bleeding dog tail tip
A little blood can spread across walls and floors when a dog whips its tail, so the mess alone doesn’t tell you how serious the injury is. Check the wound itself, whether bleeding stops with pressure, and how your dog is acting. If the wound is split or bleeding persists, don’t wait to see whether a home bandage fixes it.

What happy tail syndrome is — and why wagging splits the tail tip
Happy tail syndrome is a recurring tail-tip injury caused when a dog’s wagging tail repeatedly strikes hard surfaces, leaving cracked or open skin that can bleed and hurt. It’s a pattern of repetitive trauma, not an illness caused by a dog being happy. The same condition is sometimes called kennel tail or split tail.
Why the wound keeps reopening
The tail tip has little protection from impact. Each collision with a wall, doorframe, furniture, or crate can knock off a fragile scab or disrupt new tissue before it closes. A dog may then leave blood spatter on a wall, lick the injury, and reopen it again during the next excited greeting.
This cycle explains why happy tail syndrome won’t heal with cleaning alone: the impact has to stop long enough for the wound to repair. A deep laceration, suspected tail fracture, or injury that exposes underlying tissue isn’t a simple tail-tip scrape and needs veterinary assessment.

Which dogs are at risk, and what signs point to a tail-tip injury?
Large, active dogs with long, powerful tails are commonly affected. Labradors, Great Danes, Pit Bulls, German Shepherds, and Greyhounds are among the breeds described as prone, but any dog can injure its tail this way. A narrow room, hard walls, doorways, or crate bars can turn ordinary wagging into repeated impact.
Look for a raw or split tail tip, small cuts or abrasions, scabbing, fresh blood after wagging, repeated bleeding, or licking and biting at the area. Some dogs also pull away or guard the tail when it’s touched. Blood spatter may be the first clue, particularly if the wound is small and the dog otherwise seems well.

Cats can injure their tails, but “happy tail syndrome” is chiefly used for recurrent tail-tip injuries in dogs. Any cat with a bleeding or painful tail should still be assessed based on the injury and symptoms.
How to bandage and protect a dog’s tail so the wrap stays on
A tail bandage can provide temporary protection for a minor wound, but it’s easy to make a wrap too tight, too bulky, or too short. If possible, ask your veterinarian to demonstrate a safe dressing on your dog. A bandage is a stopgap — not a substitute for an exam when the wound is deep, infected, or repeatedly reopening.
A temporary tail bandage, step by step
Materials: non-stick wound pad, sterile saline or clean water, soft padding roll or rolled gauze, conforming gauze, porous adhesive tape, blunt-tipped scissors, and an Elizabethan collar if your dog chews or removes the dressing.
- Calm your dog and ask a helper to keep them still. Rinse away surface debris with saline or clean water, then gently pat the area dry.
- Place a non-stick pad over the wound, covering the tail tip and a small margin around it.
- Add soft padding loosely. Use enough to cushion the wound without making the bandage so bulky that it can’t grip the taper of the tail.
- Wrap conforming gauze over the padding with light, even tension, overlapping each turn by about half its width. Extend the wrap several inches up the tail beyond the wound; a short wrap at the tip can slide off.
- Use a few strips of porous tape to anchor the top edge of the gauze to the fur above the wrap. Don’t stick adhesive directly to the wound or tightly encircle bare skin with tape.
- Check the exposed tail tip. It should remain warm and its usual color. If you can’t slip a finger gently under the bandage, or the tail below it becomes swollen, cool, or discolored, remove the wrap and contact a veterinarian.
- Check the dressing at least twice daily for slipping, dampness, odor, or swelling. Replace it if it becomes wet, dirty, tight, or displaced, and keep it dry between checks.

Wraps commonly fail because they’re too short for the tapered tail, too bulky to stay in place, too tight and interfere with circulation, or damp underneath. Dogs may also chew them off. If the bandage keeps slipping, don’t solve the problem by adding more tape or tightening it. Use an Elizabethan collar to deter chewing and ask a veterinarian for an in-person demonstration or a different protection plan. If two or three careful attempts still fail, stop improvising and seek veterinary help.
When a protector or Elizabethan collar helps
An Elizabethan collar can prevent chewing at a wound or bandage. A tail sock or fitted protector, including a harness-style device such as a K9 TailSaver, may help reduce impact for some dogs. Fit, ventilation, freedom of movement, and the ability to inspect the wound all matter; no protector treats infection or makes a deep wound safe to manage at home.
Pool noodles and foam pipe insulation can slip, trap moisture, restrict circulation, or conceal a worsening wound. Thick padding may also attract chewing. Avoid these DIY fixes unless your veterinarian approves a specific setup for your dog.

Compare wound care, protectors, veterinary treatment, and amputation
The right treatment depends on wound depth, infection, how often the tail is striking surfaces, and whether a protection plan can be maintained. A small wound may need brief protection and monitoring; a chronic wound or repeated reopening needs a more structured plan with a veterinarian.
Treatment costs and the cumulative cost of repeat visits
The following are rough U.S. planning ranges, not guaranteed quotes. Actual prices vary with location, clinic, wound severity, anesthesia, and follow-up. Ask for an itemized estimate before deciding on treatment.
| Option | When it may help | Limitations and risks | Typical cost factors | Healing timeline / checkpoints | When to involve a veterinarian |
|---|---|---|---|---|---|
| Home first aid and monitoring | Small, superficial wound with bleeding controlled and no concerning signs | Easy to underestimate depth; may not heal if impact continues | About $15–$40 per week for basic supplies such as pads, gauze, tape, and saline | Judge progress at the Days 1–3, week 1, and week 2 checkpoints | If it reopens, stops improving, or shows possible infection |
| Owner-applied temporary bandage | Short-term protection while arranging advice or between visits | Can slip, trap moisture, or restrict circulation | Similar supply costs; repeated failed wraps add up | Short-term bridge; inspect at each twice daily check and stop after repeated failures | For a demonstration, or when repeated wrapping fails |
| Tail protector | Reducing re-impact for a dog whose tail keeps striking surfaces | Fit and chewing problems; heat or moisture can build up; does not treat an infected wound | Roughly $40–$100 or more, depending on design | Keep in place through the week 1 and week 2 milestones and confirm the wound is closing underneath | To confirm fit and check that the wound underneath is healing |
| Veterinary wound care | Deep, split, infected, painful, or repeatedly reopened wounds | May require repeat visits; sedation or medication may add cost | An exam may be about $60–$150; bandage changes may be about $30–$100 each; medication is extra | Recheck interval set by the clinician, commonly around the week 1 and week 2 milestones | This is the appropriate baseline for wounds beyond minor surface injuries |
| Partial tail amputation | Chronic nonhealing or severe recurrent injury when conservative care has failed | Requires anesthesia and surgical recovery; a significant decision with surgical risks | Several hundred dollars to roughly $1,500 or more, depending on the procedure and care included | Procedure plus a recovery period with scheduled rechecks | A veterinarian should assess whether it is appropriate and provide a surgical estimate |

Repeated clinic bandaging can cost more over time than the initial supplies or a protector, especially if the wound keeps reopening and requires multiple visits. But price alone shouldn’t decide treatment: an ill-fitting protector or home wrap can delay needed care. Veterinary treatment may include wound assessment, professional bandaging, pain relief, and antibiotics when a veterinarian finds they’re warranted. Sedation may be considered for a painful or difficult dressing change; it’s not a do-it-yourself option.
Laser therapy is sometimes discussed as an add-on, but the evidence provided here doesn’t establish how much it speeds healing for happy tail wounds compared with effective mechanical protection. Ask the veterinarian what outcome they expect, what evidence applies to your dog’s injury, and what it adds to the estimate.
Pet insurance coverage depends on the policy, waiting periods, exclusions, and whether the insurer considers the injury pre-existing. Check your plan before assuming that wound care or surgery will be reimbursed; ask what records and itemized documentation the insurer requires.
When partial tail amputation is considered
Partial tail amputation, also called caudectomy, may be discussed when a severe or chronic wound doesn’t heal despite a suitable conservative plan. It’s a veterinary decision, not the automatic next step after one failed bandage. A clinician can assess how much tail is affected, whether infection or other injury is present, and what alternatives remain.
Surgery carries anesthesia and recovery demands, so ask what the estimate includes: examination, anesthesia, surgery, medication, rechecks, and any bandage changes. Also ask how the wound will be protected at home and what signs require a prompt recheck.
Healing time, recurrence, and life after partial tail amputation
There’s no reliable single healing clock for every tail-tip wound. Depth, infection, continued impact, and whether the dog can keep protection on all influence progress. Treat any timeline as a checkpoint rather than a promise, and contact your veterinarian if the wound worsens or fails to improve.
What changes the healing timeline
Use these checkpoints to judge direction, not to replace veterinary follow-up:
- Days 1–3: Bleeding should be controlled, and the surface may begin to dry. Increasing swelling, heat, pain, or discharge is a reason to contact a veterinarian sooner.
- Around week 1: Look for a wound that stays closed between wagging episodes and no fresh blood on walls or floors. Reopening means the impact or protection plan needs attention.
- Around week 2: A wound that is shrinking and looks healthier may be progressing. If it looks unchanged after one to two weeks, or keeps reopening despite protection, arrange reassessment rather than simply waiting longer.
These checkpoints are practical monitoring guidance, not a guarantee that a wound should heal on that schedule. Photograph the tail every two or three days from the same distance, with a familiar object for scale. Photos can help you and your veterinarian tell whether the wound is shrinking.

Repeated reopening can prolong recovery, and recurrence is more likely if the dog returns to the same impact-heavy environment before the wound is protected and healed. There isn’t a dependable recurrence percentage available here, so a precise prediction would be misleading. A wound that repeatedly bleeds deserves a veterinary plan even if each episode seems small.
What owners can expect after surgery
After partial amputation, dogs need a recovery period and follow-up according to the surgeon’s instructions. Ask about activity restrictions, wound checks, pain control, and preventing licking. Dogs may adapt well to a shorter tail, but individual outcomes and changes in movement or communication shouldn’t be guaranteed without evidence specific to the dog. The available evidence here doesn’t support a precise claim about balance or social effects.

Tail docking isn’t a routine prevention strategy and shouldn’t be treated as equivalent to medically indicated surgery for a chronic injury. Discuss any proposed surgery with a veterinarian who can explain the expected benefit and alternatives.
Prevent the next impact: change the room, routine, and protection plan
While the tail heals, change the surfaces and routines that keep hitting it. Walk through your home at your dog’s tail height and look for hard edges within wagging range; blood spatter can help identify the impact zone.
Walls and doorways
- Pad the wall at tail height with a padded wall protector or another secure, flat barrier.
- Soften narrow doorframe edges and widen tight turning paths by moving furniture.
- During greetings, calmly hold or leash your dog until they pass through a narrow space; don’t punish normal wagging.

Crate and resting area
- Check whether the crate gives your dog room to turn without striking the bars. Consider a more suitable size or a veterinarian-approved way to protect exposed edges.
- Move food and water stations away from walls the tail hits during excited mealtimes.
- Pull the bed away from a wall if the tail is repeatedly striking it while your dog settles.
Routine and transport
- Pad hard edges near a car’s cargo area or tailgate before loading.
- Use runners or rugs where slippery floors make your dog skid or turn abruptly.
- Reduce high-impact excitement in confined spaces while the wound heals, without trying to suppress normal behavior.
Choose any protector for secure fit, ventilation, and easy wound inspection. A device shouldn’t replace wound care or veterinary advice. If injuries recur despite changes at home and appropriate protection, ask your veterinarian to reassess the plan.
Your next-step checklist for a tail wound that keeps reopening
- Stop active bleeding. Apply clean gauze and steady pressure. If bleeding doesn’t stop after 10–15 minutes, seek same-day veterinary care.
- Assess the wound and your dog. A deep, split, or worsening wound, infection warning signs, marked pain, or changes in appetite or energy need veterinary attention.
- Protect only a minor wound temporarily. Rinse surface debris with saline or clean water, use a safe temporary dressing if you can apply it without constriction, and prevent chewing. Arrange veterinary advice if it reopens or doesn’t improve.
- Remove the impact. Identify the wall, doorway, crate, or furniture edge and pad or reposition it while the tail heals.
- Track what happens. Photograph the wound every few days and note bleeding episodes, bandage changes, and any signs of worsening.
- Ask for a plan and an estimate. Request a follow-up interval, a demonstration if you’re expected to bandage at home, an itemized estimate, and any documentation needed for an insurance claim.
- Stop repeating a failed wrap. If it slips, becomes wet, or seems tight — or the wound keeps reopening — ask for a veterinary reassessment rather than adding more tape.

| Option | When It May Help | Limitations and Risks | Typical Cost Factors | Healing Timeline / Checkpoints | When to Involve a Veterinarian |
|---|---|---|---|---|---|
| Home first aid and monitoring | Small, superficial wound with bleeding controlled and no concerning signs | Easy to underestimate depth; may not heal if impact continues | About $15–$40 per week for basic supplies such as pads, gauze, tape, and saline | Judge progress at the Days 1–3, week 1, and week 2 checkpoints | If it reopens, stops improving, or shows possible infection |
| Owner-applied temporary bandage | Short-term protection while arranging advice or between visits | Can slip, trap moisture, or restrict circulation | Similar supply costs; repeated failed wraps add up | Short-term bridge; inspect at each twice-daily check and stop after repeated failures | For a demonstration, or when repeated wrapping fails |
| Tail protector | Reducing re-impact for a dog whose tail keeps striking surfaces | Fit and chewing problems; heat or moisture can build up; does not treat an infected wound | Roughly $40–$100 or more, depending on design | Keep in place through the week 1 and week 2 milestones and confirm the wound is closing underneath | To confirm fit and check that the wound underneath is healing |
| Veterinary wound care | Deep, split, infected, painful, or repeatedly reopened wounds | May require repeat visits; sedation or medication may add cost | An exam may be about $60–$150; bandage changes may be about $30–$100 each; medication is extra | Recheck interval set by the clinician, commonly around the week 1 and week 2 milestones | This is the appropriate baseline for wounds beyond minor surface injuries |
| Partial tail amputation | Chronic non-healing or severe recurrent injury when conservative care has failed | Requires anesthesia and surgical recovery; a significant decision with surgical risks | Several hundred dollars to roughly $1,500 or more, depending on the procedure and care included | Procedure plus a recovery period with scheduled rechecks | A veterinarian should assess whether it is appropriate and provide a surgical estimate |
FAQ
Can cats get happy tail syndrome?
Cats can injure their tails, but happy tail syndrome is chiefly used to describe recurrent tail-tip injuries in dogs whose tails strike hard surfaces while wagging. A cat with a bleeding or painful tail should still be assessed according to the injury and symptoms.
Do tail protectors prevent happy tail injuries?
A properly fitted protector may reduce impact for some dogs, but fit, movement, ventilation, and access to inspect the wound matter. It is not a substitute for veterinary care when a wound is deep, infected, or repeatedly reopening.
Does tail docking prevent happy tail syndrome?
Tail docking is not a routine prevention strategy and should not be treated as an alternative to environmental changes or wound care. Partial amputation may be considered by a veterinarian for a chronic, nonhealing injury after discussing risks and expected outcomes.
Is happy tail syndrome painful for dogs?
An open or split tail tip can be painful, and some dogs pull away or guard the tail when it is touched. Marked pain, lethargy, or a dog that stops eating are reasons to seek veterinary care the same day.