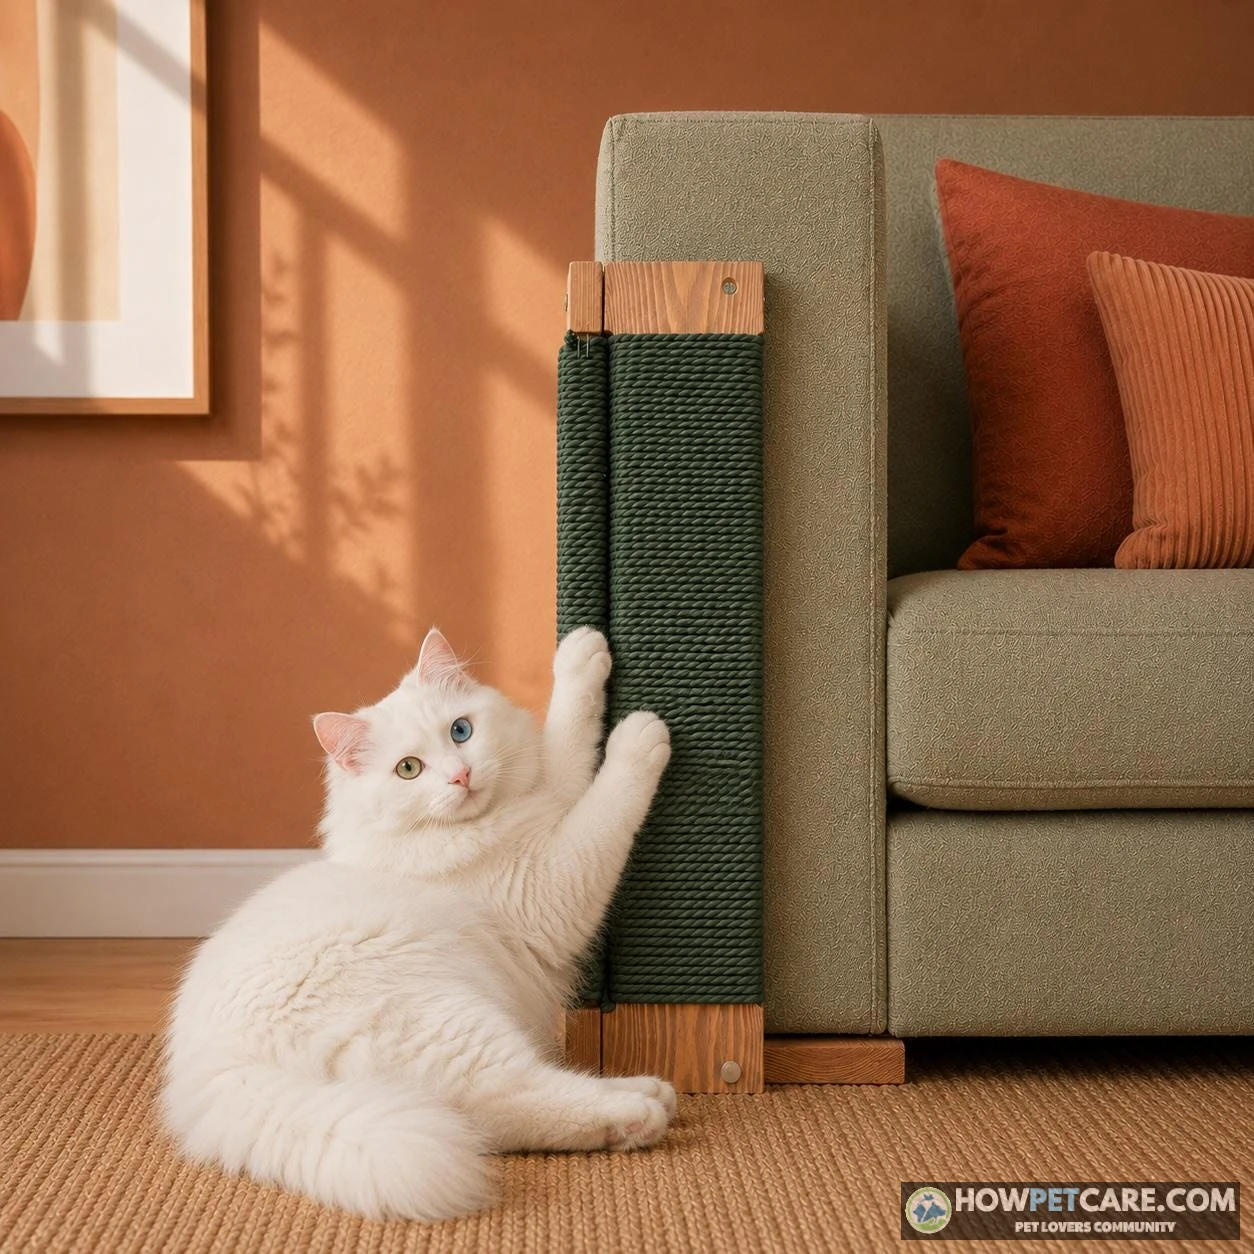

You can’t stop a cat from scratching — it’s a natural instinct — but you can redirect it. Place a tall, stable scratching post beside each targeted spot, make furniture unappealing with tape or deterrent spray, trim your cat’s nails, and reward every post scratch. Most cats switch within 2–4 weeks.
The fastest way to protect your couch, chairs, and walls isn’t to stop your cat from scratching—it’s impossible and unhealthy—but to give the cat a better target while making the furniture less inviting. In practice, this means a four‑part setup that works right away and continues for a month:
- Place attractive scratching posts next to every spot your cat currently targets.
- Apply deterrents (tape, spray, or protectors) on the furniture to reduce immediate damage.
- Trim nails or use soft nail caps to limit the sharpness of each claw while retraining.
- Use positive reinforcement—treats, praise, and play—every time the cat works on a post.
Most owners see a noticeable shift within 2–4 weeks when the plan is consistent, but the habit change can take up to a month for older cats with long‑standing furniture preferences. This guide builds the complete, step‑by‑step retraining timeline that top‑ranking pages miss, plus the post‑selection detail, nail‑care techniques, and surface‑specific protection you need to finish the job.
Scratching itself is a normal behavior driven by stretching, shedding nail sheaths, and territorial marking—recent research, including a 2024 University of Prince Edward Island study led by Yasemin Salgirli Demirbas, links spikes in scratching to environmental stressors like loud noise or children.
Why Your Cat Scratches Furniture (And How to Tell If It’s Stress)
Normal scratching vs. stress‑related marking
Cats scratch to stretch their bodies, shed the outer nail sheath, work out muscles, and leave visual and scent marks using scent glands in their paws. Furniture is attractive because it’s sturdy, tall, textured, and often placed in social areas where the cat wants to claim territory.
When scratching becomes stress‑driven, you’ll see patterns like:
- A sudden spike in frequency.
- Scratching near doors, windows, or under furniture.
- Other stress signs – hiding, over‑grooming, loss of appetite.
Research confirms that environmental stressors (loud noise, new pets, frequent schedule changes) are directly tied to increased scratching. Mapping where and when the cat scratches helps you spot the trigger. Adding a Feliway diffuser or pheromone spray near the target zone can calm the cat while you retrain.

A calm, hidden space (cat bed, a covered hammock, or a small kennel) provides a refuge that reduces overall scratching demand.
Why kittens scratch furniture and what’s different for them
Kittens explore with their claws early, and their tiny nails grow faster. Their furniture habits form quickly, so early intervention is key – a lower, softer post that matches the kitten’s size works better than a towering adult post. Positive reinforcement should start the moment the kitten touches any appropriate surface.
What NOT to Do: Avoid Punishment and Declawing
Never scold, spray water, or otherwise punish a cat for scratching. Punishment only heightens stress and teaches the cat to hide the behavior, making it harder to redirect. Declawing is a painful, invasive surgery that removes the whole nail with the bone. It can cause chronic pain, litter box avoidance, and aggression. Humane alternatives – posts, deterrents, nail trims, and caps – are strongly preferred. Avoid using laser toys as the sole entertainment; they trigger a false sense of prey failure and can increase stress‑related scratching.
Choosing the Right Scratching Post: Material, Height, Orientation, and How Many
Scratching post vs. cat tree: which one fits your home
A cat tree often combines climbing, perching, and scratching; it’s ideal when you need vertical space and multiple surfaces. A single post is enough if the cat prefers a dedicated scratching zone and space is limited.
Where exactly to put posts for the fastest switch
Place a post right next to the damaged furniture – within a foot of the spot. Also put one near sleeping areas for after‑nap stretches and in high‑traffic zones so the cat discovers it naturally.

Evidence: Positioning multiple scratching surfaces near preferred spots "helps reduce furniture damage".
Below is the Scratching Post Selection Checklist you should run through before buying.
Run through this list before you buy. A post that fails even one of these checks is the most common reason cats keep scratching the couch.
- Material matches what your cat already scratches. Pulling threads on fabric upholstery → sisal fabric or rope. Shredding carpet or rugs → cardboard or a horizontal sisal pad. Avoid carpet‑covered posts if your cat scratches your rugs – the textures blur together.
- Tall enough for a full stretch. The post should be at least as tall as your cat standing on hind legs, fully extended – roughly 28‑32 inches for an average adult cat. Measure your cat’s stretch on the furniture it’s already scratching for a custom number.
- Passes the wobble test. Push the top of the post sideways in the store (or check reviews for ‘wobbly’ if buying online). If it tips or sways, most cats will reject it – the couch never moves, and the post shouldn’t either.
- Orientation matches the scratching style. Scratches upright surfaces (couch arm, wall corner) → vertical post. Scratches flat surfaces (carpet, rug edges) → horizontal or angled scratcher.
- Quantity follows the cats + 1 rule. Two cats → minimum three scratching surfaces spread across rooms. Every cat needs a post it can claim without competing.
- One post sits next to each damaged spot. A post in a spare room does nothing for a cat marking the living‑room sofa.
- You’ve budgeted for a replacement. Sisal wears out – that’s a sign it works. A heavily frayed post loses appeal, so plan to refresh or replace it roughly every 6‑12 months.
Table: Scratching post types compared
| Post type | Material | Best for | Durability | Typical price range |
|---|---|---|---|---|
| Cardboard scratcher | Heavy‑grade corrugated cardboard | Horizontal scratchers, budget, kittens | 2‑3 months (shreds quickly) | $8–15 |
| Sisal rope post | Natural sisal fibers wrapped around a sturdy core | Cats that pull threads, vertical scratchers | 6‑12 months (slow wear) | $25‑40 |
| Carpet‑covered post | Woven carpet strip | Cats that already scratch carpet | 3‑6 months (fibers fray) | $20‑35 |
| Cat tree with sisal pillar | Mixed materials, includes climbing platforms | Multi‑level activity, multi‑cat homes | 12‑18 months (depends on use) | $70‑150 |

 You might be wonderingHow to stop a puppy from biting you?How to Stop a Puppy from Biting: Safe Steps That WorkRead the answer
Step‑by‑Step Retraining Plan: Moving Scratching From the Sofa to the Post
This week‑by‑week plan is the only complete timeline you’ll find online. It assumes you have already bought a post that passes the checklist and trimmed the cat’s nails (see the nail‑care section). If you skip any step, progress slows dramatically.
Week‑by‑week timeline at a glance
| Phase | Goal | Key actions | Signs of progress |
|---|---|---|---|
| Before Week 1 | Get everything ready at once | Place a post next to every scratched spot, trim your cat’s nails, apply deterrents to the targeted furniture | The post is the closest scratchable surface to the old spot |
| Week 1 – Protect & redirect | Make the post the easiest option | Set the post directly in front of the favorite spot, rub on catnip or silvervine, reward every touch or scratch with a treat within 2 s | Cat sniffs or paws the post; first real scratches happen on it |
| Week 2 – Reinforce | Turn one‑off scratches into a habit | Keep all deterrents on, run one short wand‑toy session per day that ends at the post, reward every use | Cat uses the post without prompting; trips to the furniture drop noticeably |
| Week 3 – Expand | Shift the post toward its permanent home | Move it a few inches per day toward the final location, add a second post near a sleeping area for after‑nap stretches | Cat follows the post as it moves; seeks it out on its own |
| Week 4 – Fade deterrents | Make the new habit stick | Remove deterrents from one area at a time (not all at once), keep occasional rewards coming | No new damage for 1‑2 weeks; post is used daily |
| After Week 4 | Maintain for good | Leave all posts permanently in place, keep trimming nails every 2‑3 weeks | A one‑off scratch is a slip, not a failure – reapply that deterrent for a week rather than restarting |
If a week stalls: repeat it instead of pushing forward. Two weeks at Week 2 is normal, especially for adult cats with a long‑established furniture habit.
-
Week 1: Set up and attract
Place the post directly in front of the exact scratch zone (within 12″). The post should pass the wobble test and be the right orientation. Rub a tiny dab of catnip or silvervine on the scratching surface – this signals fun. Every time the cat touches or scratches the post, deliver a high‑value treat and verbal praise within 2 seconds. Timing is critical. Keep deterrents (tape or spray) on the furniture to make it less appealing while the post wins.
-
Week 2: Reinforce with play
End a short play session (5‑10 min) with a wand toy that finishes at the post. Let the cat make the first contact. Reward any post usage (even a paw) instantly. Consistency turns the behavior into a habit. Keep deterrents on the furniture to reduce accidental returns.
-
Week 3: Gradual relocation
Move the post 2–4 inches toward its intended permanent spot each day. SLOW movement prevents confusion. Add a second post near the cat’s sleeping area to encourage after‑nap stretching. Continue rewards and keep deterrents on while the old furniture is still attractive.
-
Week 4: Fade deterrents
Remove deterrents area by area – start with the least‑used corner, leave the rest for a week. Reduce treat frequency to occasional rewards (still for post use) to keep the behavior solid. By the end of week 4, the post should be the cat’s go‑to scratching spot.
How to use positive reinforcement and catnip correctly
Reward only scratching on the post. If the cat scratches the couch, calmly redirect, then reward the post. Catnip works best on cats that respond to it – if the cat shows no interest, try silvervine or a toy dangling from the post top. Even cats that don’t like catnip will investigate a moving toy.

What to do about scratching at night
Evening play depletes energy and reduces nighttime scratching. End the last play session 30‑45 minutes before bedtime, then offer a small meal. A post placed by the bed or right next to the couch gives an easy alternative when the cat wakes up.
Deterrents That Protect Furniture: How to Use Each One Correctly
Deterrents are a temporary shield while the post becomes the preferred target. They never replace training, but they buy you time and reduce immediate damage.
Anti‑scratch tape and furniture guards
Double‑sided tape sticks to the fabric or wood surface. Apply it in strips covering the exact scratch zone – clean, dry surfaces adhere best. Test a small piece first; tape can leave residue on some fabrics.
Clear plastic guards (corner or full‑cover) mount over the damaged area. They are waterproof, easy to clean, and last months. Use them on couch arms, chair corners, and wall edges.

Deterrent sprays and pheromone products
Cat deterrent spray (bitter apple, citrus, or synthetic deterrent) is misted lightly over the target area after a hidden‑spot stain test. Reapply as the label directs – typically every 24–72 h at first, then weekly.
Pheromone diffusers (Feliway) emit calming scents that reduce stress‑related marking. Plug one unit near the scratching zone; a single unit covers about 700 sq ft. Refill cartridges monthly.
Evidence: Studies confirm that punishment such as scolding or water spraying is ineffective and harmful while positive‑reinforcement and proper post placement are effective.
Below is a comparison table of common deterrents, surfaces they work best on, application steps, longevity, and typical cost.
| Product | Best surfaces | How to apply | When to reapply or replace | Typical cost |
|---|---|---|---|---|
| Double‑sided anti‑scratch tape | Fabric upholstery, couch arms, wood trim | Apply to a clean, dry surface in strips covering the exact scratch zone | Every 2‑4 weeks, or when it collects lint and loses stickiness | $8–15 per roll |
| Cat deterrent spray (bitter or scent‑based) | Fabric, wood | Mist lightly over the area after a hidden‑spot stain test; never soak | Per label – usually every 24–72 h at first, then weekly | $10–15 per bottle |
| Clear plastic scratch guards / corner protectors | Couch corners, chair arms, wall corners | Press or pin into place over the damaged area | Months – replace only if scratched through or loosened | $15‑30 per set |
| Fitted cover, throw, or slipcover | Any upholstered furniture, leather (safest option) | Drape snugly over the targeted area | Leave in place until the habit has moved to the post (usually Week 3–4) | $20‑50 |
| Pheromone diffuser | Rooms with stress‑driven marking | Plug in near the scratching zone; one unit covers roughly 700 sq ft | Refill monthly; starter kit then $15‑20 refills | $25‑40 starter |
| Pheromone spray | Specific scratched spots on furniture | Spritz the spot once or twice daily; don’t spray directly on the cat | Daily for the first 2 weeks, then taper | $15‑25 per bottle |
| Foil or plastic carpet runner (DIY) | Carpet, rugs, fabric seats | Lay over the area nub‑side up or as a smooth sheet cats dislike stepping on | Remove once the cat ignores the spot – typically Week 3–4 | $0‑10 |
Cautions: Never stick tape directly on leather or finished wood – it can lift the surface when removed. Always patch‑test sprays on a hidden area, and skip essential‑oil‑heavy homemade sprays, which can be unsafe for cats.
Limit the Damage Now: Nail Trimming and Soft Nail Caps
Keeping nails short reduces damage while retraining, and it’s a humane alternative to declawing.
How to trim a cat’s nails step by step
-
Prepare and calm
Choose a quiet moment when the cat is relaxed (after a meal or play). Have cat‑specific nail clippers (guillotine or scissor style) ready. If the cat resists, wrap it gently in a towel – only if absolutely necessary.
-
Locate the quick
The quick is the pink‑red blood vessel inside the nail. Trim only the clear tip; avoid the quick to prevent bleeding and pain.
-
Trim one or two nails
Clip at a 45° angle just beyond the tip. If the cat moves, stop and try again later – many cats tolerate a few nails at a time. Have a styptic pencil or cornstarch nearby in case of accidental cuts.
-
Reward immediately
Offer a treat and praise right after each trim session to build a positive association.
Frequency: Every 2‑3 weeks for most cats; increase to monthly for indoor cats with slower growth.

Soft nail caps: sizing, applying, and when to skip them
Soft nail caps (like Soft Paws) glue over the nail tip and last several weeks until the nail grows out and sheds the cap. Size matters – the cap should be a snug fit but not tight enough to restrict movement. Apply after a nail trim, using the smallest dot of pet‑safe glue needed.
When caps aren’t a fit: Cats that chew, paw at, or dislike the texture should not wear them. Look for signs of irritation or repeated cap loss – remove them and try again later.
Cost: A starter kit (approximately 30 caps, glue, and a filing tool) runs $15‑25 and lasts 2‑3 months per cat.

Protecting Specific Surfaces and Repairing Damage Already Done
Leather furniture
Avoid sticky tape or strong sprays on leather. Instead, use a protective throw or clear guard over the leather surface. Spot‑test any spray on an inconspicuous area first. For minor scuffs, a leather conditioner can restore flexibility and reduce the cat’s interest.
Fabric, carpet, and walls
- Fabric: Tightly woven fabrics resist claws better than looped pile. A slipcover or throw adds a barrier.
- Carpet & rugs: Place a horizontal scratcher directly in the damaged spot; carpet protectors (non‑slip mats) under the rug also help.
- Walls & corners: Install clear corner guards or a vertical post right against the wall. This redirects vertical marking.
Fixing furniture that’s already scratched
- Snagged threads: Use fine‑tipped fabric repair tape or a small stitch to tighten.
- Minor fabric damage: Upholstery repair kits (vinyl or fabric filler) can patch small holes.
- Leather scuffs: Leather repair filler (clear or colored) can fill scratches; condition afterward.
When damage is extensive, covers or slipcovers are often cheaper than re‑upholstering. Keep the damaged area covered until the cat moves to a post; otherwise the old texture still draws the cat back.

If Your Cat Ignores the Scratching Post: Troubleshooting What’s Wrong
Even a perfect post can be ignored. Use this diagnostic checklist to find the root cause and apply a single fix at a time.
Work through these in order — each has a specific fix. Change one thing at a time and give it a week before trying the next, so you can tell what actually worked.
- Wrong spot? The post is in a corner or spare room while the cat scratches the sofa. → Fix: Move it directly beside the scratched furniture, ideally in front of the exact spot.
- Wrong material? Cat shreds carpet but you bought a vertical sisal post. → Fix: Match the texture it’s choosing – cardboard or a flat sisal pad for carpet scratchers, sisal rope for upholstery shredders.
- Too short or wobbly? Cat can’t get a full stretch, or the post tips when leaned on. → Fix: Replace with a post at least 28‑32 inches tall with a heavy base; wedge a lighter post against a wall as a temporary patch.
- Post isn’t advertised? Cat doesn’t know it exists or has no reason to try it. → Fix: Rub catnip or silvervine into the scratching surface, hang a toy from the top, and treat‑reward every interaction for a week.
- Old spot still beats it? The furniture is still more appealing than the post. → Fix: The post says "yes" – now make the couch say "no" with tape or a guard on the exact scratch zone.
- Stress or pain underneath? Scratching started suddenly, is clustered near doors or windows, or came with hiding or overgrooming. → Fix: Add a pheromone diffuser, look for a household change (new pet, move, new schedule), and see a vet if the change was abrupt – joint pain can change scratching habits too.
Does catnip on a scratching post work?
Catnip attracts roughly 70‑80% of cats, but effectiveness varies. If the cat shows no interest after a few days, try silvervine (also called “catmint”) or a simple toy dangling from the post. Even without catnip, a post that is stable, tall enough, and placed in the right spot will be used by most cats once they discover it.

Your Action Checklist and Budget Planner for the First Week
Turning knowledge into action is the final step. Follow the day‑by‑day checklist and stay within your budget.
Day 1 checklist
- Observe – note exact scratching spots, frequency, and surface type.
- Trim nails – use the step‑by‑step guide; if the cat resists, trim one or two nails and try again later.
- Buy or place posts – run the Scratching Post Selection Checklist; put at least one post next to each damaged spot.
- Apply deterrents – choose tape, spray, or a protective cover for the most targeted furniture.
- Set up rewards – have treats and a clicker (or verbal cue) ready for the first post interaction.
- Schedule daily short play – 5‑10 min of wand play ending at the post.

Starter budget tiers
| Tier | What it buys | Estimated total | Good for |
|---|---|---|---|
| Minimal – ~$15‑$35 | One horizontal cardboard scratcher, a roll of double‑sided tape, cat nail clippers | $15‑$35 | Single cat, light scratching, or testing what texture your cat prefers before committing |
| Standard – ~$45‑$90 | One tall sisal post (28″+), tape or deterrent spray, clippers, catnip for training | $45‑$90 | Most homes – covers the core redirect + deter + nail care setup |
| Full – ~$90‑$150 | Tall sisal post plus a second scratcher or small cat tree, plastic guards or a throw, pheromone diffuser, soft nail cap kit | $90‑$150 | Multi‑cat homes, stress‑related scratching, or heavy existing damage across several surfaces |
Where to spend first if money is tight: a stable post matched to your cat’s texture preference beats three cheap deterrents. The deterrent only buys time – the post is what actually ends the behavior.
What you can skip: cat furniture marketed at $200+ does the same job as a $50 post for this problem. Spend on stability and height, not aesthetics.
By following this plan, you’ll have a working retraining setup – correctly chosen and placed scratching posts, properly applied deterrents, and a nail‑care routine – that redirects your cat’s scratching away from furniture within a few weeks.
 You might be wonderingDo cats dreamDo Cats Dream? What Twitching Means and When to WorryRead the answer
FAQ
Can I stop furniture scratching without declawing my cat?
Yes. Provide suitable scratching posts, use deterrents on furniture, keep nails trimmed, and consider soft nail caps. Declawing is an invasive amputation that can cause pain and behavior problems, so these alternatives are strongly preferred.
What home remedies keep cats from scratching furniture?
Double-sided tape, foil, or a throw blanket over the target area can make furniture less appealing. They work best when paired with an attractive scratching post, since the cat needs somewhere else to scratch.
How do you discipline a cat that keeps scratching the sofa?
Punishment doesn’t work and can increase stress, which may make scratching worse. Redirect to a scratching post, reward the right behavior, and make the sofa less appealing instead.
Do cats grow out of scratching furniture?
No, scratching is a lifelong natural behavior. Kittens can learn to use posts early, and adult cats can be redirected, but they will always need an appropriate place to scratch.
How often should I replace a scratching post?
Replace or re-cover a post when it’s wobbly, shredded to the core, or the cat stops using it. Many owners rotate in a fresh cardboard scratcher every few weeks to keep interest high.