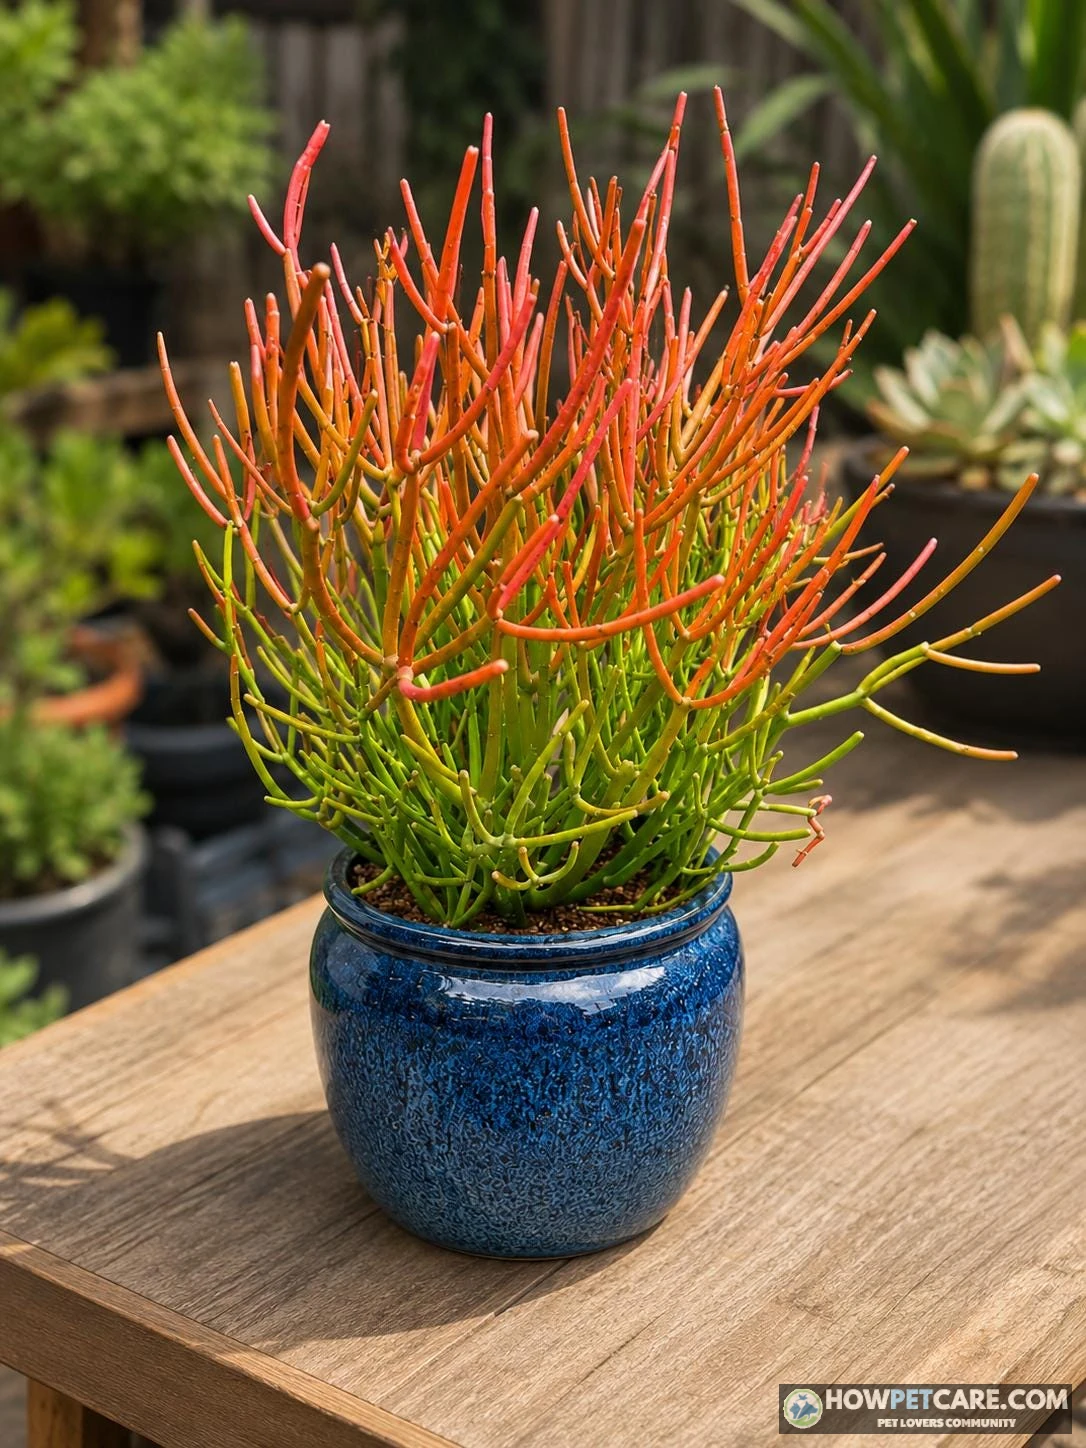

To care for an indoor pencil cactus (Euphorbia tirucalli), provide 4 to 6 hours of direct sunlight daily on a south- or west-facing sill. Plant in gritty, fast-draining mineral soil (60% pumice/perlite to 40% organic mix) in a terracotta pot. Water thoroughly only when the soil is completely dry from top to bottom.
Indoor pencil cactus care succeeds on three non-negotiable fundamentals: supplying four to six hours of intense sunlight, planting in a gritty mineral-rich substrate that drains immediately, and withholding water until the container dries out completely from top to bottom. While commonly sold as a low-maintenance houseplant, this architectural succulent requires precise moisture control to avoid basal collapse and strict handling protocols to protect against its corrosive milky latex.
Euphorbia Tirucalli vs. True Cacti: Growth Profile
Despite its common name, the pencil cactus (Euphorbia tirucalli) is not a true desert cactus of the botanical family Cactaceae. It is a semi-arid stem succulent belonging to the spurge family (Euphorbiaceae), native to Southern and Eastern Africa.
True cacti produce defined surface cushions called areoles, from which spines, glochids, branches, and flowers emerge. Euphorbia tirucalli lacks areoles entirely. Instead, it grows smooth, cylindrical green stems that branch in whorls or candelabra patterns, designed to store moisture during extended droughts. When damaged, true cacti weep a clear, water-based mucilage. Euphorbias, by contrast, pump a pressurized white latex sap through internal laticifer vessels. In frost-free landscapes, this evergreen shrub can surge into a 30-foot-tall tree, while indoor container specimens grow between one and two feet annually until restricted by container volume or structural pruning.
Green Pencil Tree vs. ‘Firesticks’ Cultivars
The standard green pencil tree produces uniform, deep-emerald cylindrical stems that maintain high concentrations of chlorophyll across typical indoor lighting. In trade and retail nurseries, you will frequently encounter its most famous mutant cultivar: Euphorbia tirucalli ‘Firesticks’ (marketed interchangeably as ‘Sticks on Fire’ or red pencil tree).
The primary biological difference between the wild-type green pencil tree and ‘Firesticks’ lies in carotenoid and anthocyanin expression. The ‘Firesticks’ cultivar possesses reduced baseline chlorophyll in its apical stems. Under high ultraviolet (UV) radiation and controlled thermal stress, the plant protects its cellular machinery by flooding its tissue with protective anthocyanin pigments, shifting stem colors from pale lime yellow to neon orange and ruby red.
Keeping a ‘Firesticks’ vibrant indoors requires substantially more direct solar exposure than maintaining a standard green Euphorbia tirucalli. When placed in standard bright indirect light, a ‘Firesticks’ plant will gradually revert to dull yellow-green as it builds up chlorophyll to capture scarce ambient photons.

Light Requirements: How to Acclimate Firesticks for Color Without Scorch
Indoor pencil cactus care demands high light intensity. Both the green form and ‘Firesticks’ thrive on a south- or west-facing sill that delivers uninterrupted direct sun. However, moving a plant that has spent months in dim greenhouse conditions or low-light indoor corners straight into blistering direct sunlight will cause phototoxic shock and irreversible sunscald.
Four-Week Sun Acclimation Schedule
Safe coloration requires a deliberate step-up plan. This schedule conditions stem cuticles and stimulates protective anthocyanin production without thermal tissue breakdown.
| Week | Direct Sun Exposure | Optimal Location & Light Type | Observable Plant Indicators |
|---|---|---|---|
| Week 1 | 0 hours (0% direct) | Bright indirect light (3–4 ft from an unshaded south window, or under 200–300 PPFD LED grow light). | Uniform lime green to pale yellow-green stems. Stems remain turgid and smooth. |
| Week 2 | 1 to 2 hours early morning sun (before 10 AM) | Directly on an east-facing sill, or south-facing window with sheer curtain drawn during peak hours. | Golden-yellow highlights emerge on apical stem tips. No shriveling. |
| Week 3 | 3 to 4 hours direct sun (morning through midday) | Direct south- or west-facing sill without diffusion; outdoor sheltered porch with morning sun. | Tips transition from amber to vivid coral-orange. Base stays firm and green. |
| Week 4+ | 5 to 6+ hours full direct sun | Unobstructed south window or full outdoor exposure once night temps exceed 55°F (13°C). | Deep fiery red-orange throughout top third of plant. Stop signal: Bleached white patches or blistered tan lesions indicate sunscald—move back to Week 2 immediately. |
Distinguishing Healthy Color Stress from Sunburn
Monitoring observable plant markers allows you to catch light distress before stem death occurs:
- Healthy Anthocyanin Response: Vibrant sunset tones (mandarin orange, warm gold, pinkish-crimson) developing exclusively along the topmost, youngest branch clusters. Mid-level and lower structural stems remain firm, plump, and olive green.
- Sunscald and Thermal Burn: Papery, bleached-white patches, dry tan blisters, or localized stem flattening on the side directly facing the glass. Sunburn destroys the epidermal layer; once tissue turns white and dry, it will not turn green or orange again and will eventually leave permanent calloused scars.
If you see white bleaching during Week 2 or Week 3, pull the pot back 2 feet from the glass or draw a sheer curtain between 11:00 AM and 2:00 PM for ten days before attempting another light increase.

Soil and Watering Indoors: Preventing Root Rot and Stem Collapse
Because Euphorbia tirucalli evolved in arid regions with rocky substrates, its root system requires abundant oxygen. The fastest way to kill a pencil cactus is potting it in moisture-retentive, peat-heavy soil or watering on an arbitrary calendar schedule.
Formulating a Gritty, Fast-Draining Succulent Mix
Standard commercial indoor potting soils hold moisture for several weeks, creating an anaerobic root zone where opportunistic pathogens quickly colonize the plant. To keep Euphorbia tirucalli healthy indoors, blend a customized, rapid-draining mineral substrate:
- 60% Inorganic Aeration Material: Use an equal mix of horticultural pumice (1/8 to 1/4 inch particle size), coarse perlite, and calcined clay or lava grit. Pumice provides physical weight to anchor top-heavy specimens while maintaining macropores for root respiration.
- 40% Organic Base: Use screened, low-peat succulent soil or decomposed pine bark fines. Avoid moisture-retention crystals, vermiculite, and heavy compost.
Choose an unglazed terracotta planter with at least one wide, unobstructed drainage hole. Unglazed clay breathes through its walls, wicking residual dampness away from the inner root ball and cutting soil drying time in half compared to glazed, plastic, or ceramic pots.

How Often to Water: Assessing Soil Moisture and Stem Turgor
Forget rules that instruct you to water "every 10 days" or "every two weeks". Evaporation rates fluctuate constantly with indoor ambient humidity, day length, container composition, and ambient seasonal temperatures. Instead, use an objective multi-point check to determine when the root ball is dry.
Worked Indoor Watering Decision: 8-Inch Terracotta Planter
Evaluate these four variables before reaching for the watering can:
- Plant & Container Baseline: A 3-foot specimen in an 8-inch unglazed terracotta pot filled with a 60/40 pumice-to-soil mix.
- Variable 1: Heft Test (Pot Weight). Pick the pot up by the rim. Fully saturated, this setup weighs approximately 8.5 pounds. Bone-dry, it weighs roughly 4.2 pounds. Assessment: The container feels exceptionally light, registering near its baseline dry weight.
- Variable 2: Wood Skewer Check. Insert an untreated wooden skewer to the bottom of the pot for 5 minutes. Result: The skewer pulls out completely clean and powdery dry—no darkened wood, cool dampness, or clinging grit.
- Variable 3: Stem Turgor Check. Inspect mid-tier lateral stems. Stems exhibit subtle vertical wrinkling and yield slightly to gentle compression rather than feeling rock-hard. Assessment: Cellular turgor pressure is depleted without structural dehydration.
- Variable 4: Season and Light. Current month is November; days are short, and the room sits at 68°F (20°C). Active growth has ceased for the season.
The Decision:
If this were June (active growth, 78°F, 6 hours direct light): Apply a deep drench until 20% of the volume runs freely from the drainage hole, then empty the drip tray.
Actual November Call: With seasonal dormancy active, provide a conservative partial soak (roughly 1.5 cups of room-temperature water directly over the root ball), ensuring no moisture pools in the drainage saucer. Re-check in 21 days.

Latex Sap Safety: Toxicity Risks and Clinical First‑Aid Protocols
Beneath its smooth green epidermis, the pencil tree circulates a pressurized, opaque white latex sap. This milky fluid contains complex diterpene esters (primarily phorbol and ingenol derivatives). These chemical compounds serve as an evolutionary defense against herbivores, acting as potent co-carcinogens, cellular irritants, and blistering agents. Home remedies, intentional ingestion, and therapeutic claims for pencil cactus latex are unsafe and must never be attempted.
Pencil cactus latex causes severe chemical dermatitis on contact and extreme keratoconjunctivitis if introduced into the eye. It must never be handled without personal protective equipment (PPE). Keep this plant out of reach of indoor pets and small children.
Skin Contact: Decontamination and Irritation Management
If sap contacts your skin, symptoms may not appear immediately. Diterpene esters often take two to eight hours to trigger severe erythema, burning sensations, and painful fluid-filled blisters.
-
Rinse with Cold Running Water
Immediately flush the affected skin area under cool running tap water for a minimum of 5 minutes. Do not use warm or hot water, as elevated temperatures dilate skin pores and accelerate dermal absorption of diterpenes.
-
Wash with Degreasing Soap
Pencil cactus latex contains insoluble organic resins that resist plain water. Wash the area thoroughly with an oil-cutting dish soap (such as Dawn) or an over-the-counter poison ivy wash (such as Tecnu). Lather gently without abrasive scrubbing to prevent breaking the epidermal barrier.
-
Apply Topical Hydrocortisone
Pat the skin dry with a clean, disposable paper towel. Apply an over-the-counter 1% hydrocortisone cream to suppress localized inflammation, followed by a cool, damp compress. If blistering, extensive swelling, or secondary infection develops, consult a board-certified dermatologist. If blisters spread rapidly or pain intensifies, seek medical attention promptly.

Immediate decontamination with cool water and soap is crucial after sap contact.

Ocular Exposure: Emergency Irrigation and Medical Triage
Ocular exposure to Euphorbia tirucalli latex is a medical emergency. Microscopic droplets rubbed into the eye cause rapid chemical keratoconjunctivitis, severe photophobia, corneal epithelial desquamation, and temporary or permanent visual impairment.
- Continuous Irrigation (15 Minutes Minimum): Immediately place the affected eye under a steady, gentle stream of sterile saline solution or lukewarm tap water. Hold the eyelids wide open with clean fingers to flush behind the upper and lower lids. If an emergency eyewash station is unavailable, tilt the head sideways under a kitchen sink faucet.
- Remove Contact Lenses: If wearing contact lenses, remove and discard them immediately during irrigation. Do not reinsert them.
- Do Not Instill Home Drops: Avoid self-administering over-the-counter redness-relief drops or petroleum-based ointments, which trap diterpenes against the corneal surface.
- Urgent Medical Evaluation: Escalate immediately to an emergency room or consulting ophthalmologist. Professional assessment with a slit-lamp exam and fluorescein staining is required to assess corneal erosion and initiate appropriate ophthalmic antibiotic or cycloplegic therapies.
Pet and Child Ingestion: Symptoms and Poison Control Steps
Dogs, cats, and toddlers exploring indoor plants face significant oral and gastrointestinal trauma from chewing pencil cactus stems. Contact with oral mucous membranes causes immediate, severe burning, hypersalivation (profuse drooling), vocalized distress, pawing at the mouth, head-shaking, vomiting, and potential pharyngeal edema that can compromise breathing. Pet owners who share their living space with inquisitive felines often prefer replacing irritating succulents with documented plants safe for cats, such as a lush areca palm. Much like asking are spider plants toxic to cats before bringing greenery home, understanding euphorbia risks prevents urgent emergencies. While common staples like the pothos plant present insoluble calcium oxalate hazards, euphorbia latex causes intense dermal and mucosal chemical burns.
- Immediate First Steps: Clear any remaining plant fragments from the mouth using a damp, clean cloth. Never induce vomiting at home; regurgitating acidic diterpene latex re-exposes the esophagus and pharynx to severe chemical burns.
- Small Children: Rinse the oral cavity thoroughly with cool water. Contact the Poison Control Center (1-800-222-1222 in the United States) or seek immediate emergency pediatric care if facial swelling, difficulty swallowing, or respiratory stridor occurs.
- Pets (Dogs & Cats): Offer small sips of water, low-sodium broth, or tuna water to flush the oral cavity if the animal is conscious and swallowing safely. Contact your veterinarian or the ASPCA Animal Poison Control Center (888-426-4435) immediately. Clinical interventions often require antiemetics, gastroprotective agents, pain management, and subcutaneous fluid therapy.
Pruning and Stabilizing Top‑Heavy Indoor Pencil Plants
With fast vertical growth, indoor pencil plants quickly outgrow their root foundations. Stems multiply in heavy candelabra clusters, shifting the center of gravity outward until the plant tilts dangerously or snaps under its own weight. Pruning and staking restore structural balance, but executing these tasks requires disciplined sap containment.
PPE and Workspace Preparation for Sap Containment
Pruning a pencil cactus is a controlled surgical task. Prepare your workspace systematically before making the first cut:

- Nitrile Gloves: Put on heavy-duty nitrile gloves. Standard natural latex gloves can degrade when exposed to plant terpene compounds. Double-glove if undertaking extensive canopy reduction.
- Wraparound Eye Protection: Put on sealed safety goggles or wraparound safety glasses. Standard reading glasses leave side exposure vulnerable to pressurized sap spurts.
- Protective Clothing: Wear an old long-sleeved work shirt buttoned at the wrists. Avoid touching your face or adjusting safety glasses while handling stems.
- Work Surface Isolation: Lay down heavy plastic sheeting or thick brown butcher paper beneath the container. Do not prune over bare rugs, fabric, or porous wood floors.
- Coagulation Vessel: Fill a wide-mouth container with cold tap water and set it within arm’s reach on the work table (cold water arrests and hardens dripping sap instantly).
- Blotting Station Ready: Keep a roll of disposable paper towels and a cold-water spray bottle within reach to tamp weeping cuts on the parent plant.
- Disposal Bag Open: Keep a heavy-duty sealable trash bag open adjacent to your station for immediate disposal of cut branches and soiled wipes.
- Site Quarantine: Lock pets and children out of the room until pruning and clean-up are finished.
Selective Branch Removal and Deep Staking Techniques
When a container-grown specimen lists heavily to one side, cutting stems at random worsens instability. Follow this leverage-reduction sequence:
-
Locate the Center of Gravity
Rotate the pot 360 degrees. Find the pivot point where the primary trunk bends away from the vertical center, and identify the heaviest lateral branch exerting outward torque.
-
Prune the Lever Arm
Use sanitized bypass pruners to excise the outermost 30% to 50% of that heaviest leaning branch. Cut 1/4-inch above an outward-facing nodal junction. Immediately spritz the cut on the main plant with cold water and press a damp paper towel against it for 15 seconds to halt sap weeping.
-
Relieve Weight Proportionally
Step back six feet. If the trunk still lists, remove secondary lateral forks on the leaning side rather than topping the central leader. Never remove more than 20% of the total canopy volume in a single session.
-
Insert the Deep Anchor Stake
Drive a sturdy 1/2-inch bamboo or vinyl-coated steel stake straight down into the root ball on the opposite side of the lean, keeping it 2 inches away from the trunk base. Push down until the stake hits the bottom of the pot.
-
Secure with Dynamic Tension
Use soft 1/2-inch horticultural velcro tape to loosely tether the leaning stem to the stake at its midpoint and upper third. Leave 1/2-inch of slack—do not wrench the trunk rigid, as slight movement stimulates secondary lignin formation (corking).
-
Post-Op Monitoring
Check the plant weekly for 6 weeks. Once the base forms stiff, woody support bark and the root ball anchors firmly, loosen and remove the stake.

Staking tall branches stabilizes top-heavy pencil cactus specimens.


How to Propagate Pencil Cactus Cuttings Safely
Propagating Euphorbia tirucalli via stem cuttings is straightforward when you manage sap coagulating and callousing correctly. Attempting to root fresh, uncalloused cuttings in damp soil or standing water leads directly to bacterial infection and stem rot.
Taking Cuttings and Coagulating Sap with Cold Water
- Select Healthy Cuttings: Choose robust, disease-free terminal branches roughly 4 to 8 inches in length. Avoid soft, pale growth tips or thick, woody bases; firm green or orange-tinted mid-tier segments root most reliably.
- Execute Clean Cuts: Don full PPE (nitrile gloves, long sleeves, eye protection). Use an isopropyl-sterilized razor blade or sharp bypass pruner to sever the stem cleanly just below a nodal branch joint.
- Instantly Arrest Sap Bleeding: Immediately plunge the severed end of the cutting into a cup of cold tap water for 30 to 60 seconds. The cold shock instantly coagulates and hardens the milky latex, stopping sap loss and forming a protective initial seal.
- Seal the Parent Plant: Spray the mother plant’s cut node with cold water, blot with a paper towel, and let it dry naturally.

Callousing, Medium Setup, and Rooting Aftercare
- The Callousing Phase (7 to 14 Days): Set the cuttings horizontally on a clean paper towel in a warm, dry, shaded room with active air circulation (70°F to 78°F / 21°C to 25°C). Never place fresh cuttings in direct sun. Allow the cut ends to dry until they form a firm, dry, opaque-white callus. If the cut tip remains soft, translucent, or weeping, it is not ready for planting.
- Potting Substrate: Fill a small 4-inch terracotta pot with a sterile rooting mix composed of 70% perlite or pumice and 30% coarse horticultural sand. Do not add rich potting soils or organic fertilizers.
- Planting the Cutting: Insert the calloused base 1 to 2 inches deep into the bone-dry medium. If needed, brace the cutting with a small wooden craft stick.
- Withholding Moisture: Do not water the substrate for the first 10 to 14 days. The cutting contains ample internal moisture to initiate adventitious root primordia. Applying water to an unrooted succulent suffocates the base and invites fungal decay.
- First Watering and Root Establishment: After two weeks, lightly moisten the perimeter of the pot. Bottom heat (using a seedling heat mat set to 75°F / 24°C) accelerates root emergence. Within four to six weeks, test for establishment by giving the stem a gentle upward tug. Resistance confirms that adventitious anchor roots have formed. At that point, transition the cutting to normal mature watering cycles and introduce bright sunlight gradually.
Troubleshooting Pencil Cactus Problems: Pests, Brown Stems, and Rot
Diagnosing issues on a leafless, stem-dominated succulent requires careful attention to texture, color shifts, and localized lesions.
Stem Browning at the Base: Natural Corking vs. Fungal Rot
One of the most common panics among new pencil cactus owners is seeing the lower green trunk turn rough and brown. Determining whether this indicates natural maturity or lethal root rot comes down to tactile firmness.
- Physiological Corking: As a pencil tree grows upward and adds lateral branches, its green succulent stems cannot support the accumulating structural weight. To reinforce itself, the epidermis produces lignin, transforming smooth green tissue into rigid, light-tan or gray-brown bark. Corking begins at the soil line and crawls slowly upward over years. The key test: Corked tissue is rock-hard, dry, firmly anchored, and completely odorless.
- Basal Fungal Stem Rot: Pathogens such as Fusarium and Phytophthora attack overwatered root systems and work their way up into the stem crown. Rotting stems turn dark chocolate-brown or translucent blackish-yellow. The key test: Rotted tissue is soft, spongy, water-soaked, collapses under slight thumb pressure, and frequently emits a foul, sour odor.
If the base has rotted, unpot the plant immediately. Use a sterile blade to cut away all mushy tissue, moving upward into the branches until the stem interior shows only clean, bright, white-and-green vascular bundles without brown vascular streaking. Let the salvaged healthy tops callous for 7 to 10 days, then root them as fresh cuttings. Discard the rotted base and contaminated soil.

Treating Mealybugs and Spider Mites on Smooth Stems
While Euphorbia tirucalli contains toxic sap that deters many garden chewing pests, sap-sucking insects can still colonize its smooth stems indoors.
- Mealybugs (Pseudococcidae): These insects appear as tiny, cottony white clusters nestled inside branch crotches and stem whorls. They pierce the epidermis and draw sap, excreting sticky honeydew that fosters black sooty mold. Dip a cotton swab in 70% isopropyl alcohol and dab it directly onto individual mealybugs to dissolve their waxy protective coat on contact. For larger colonies, spray the plant thoroughly with a premixed potassium salts insecticidal soap, keeping the plant out of direct sun while wet to avoid phototoxic leaf burn.
- Spider Mites (Tetranychidae): Spider mites thrive in warm, dry indoor air during winter. They produce fine silk webbing across branch joints and cause dull, yellow stippling across the stems. Wash the plant down in a shower or utility sink using a gentle stream of lukewarm water to dislodge the webbing, then wipe the stems with a diluted castile soap solution (1 teaspoon per quart of water). Increase ambient room airflow to prevent reinvasion.
| Visible Stem / Soil Symptom | Texture & Odor | Probable Cause | Immediate Corrective Action |
|---|---|---|---|
| Lower stem base turns light tan/brown with rough bark. | Hard, rigid, woody. No odor. | Normal physiological corking (natural structural strengthening as plant ages). | None needed. Do not cut or scrape. Maintain current care. |
| Stem base turns blackish-brown, spreading upward; branches collapse. | Mushy, water-soaked, soft. Musty, sour, or rotting odor. | Basal fungal stem rot (Fusarium or Phytophthora) from chronic overwatering. | Emergency triage: Unpot immediately. Cut away all soft, dark tissue until only pristine pale green tissue remains. Let callouse 7 days, then root as a new cutting. Discard contaminated soil. |
| Dull green stems show vertical creases and longitudinal shrinking. | Soft and limp to touch, but dry and fibrous (not mushy). Clean earthy odor. | Dehydration / Underwatering (drained root zone or hydrophobic soil). | Submerge the entire pot bottom in a basin of lukewarm water for 30–45 minutes to re‑hydrate hydrophobic soil, then drain thoroughly. Stems re‑plump in 48–72 hours. |
| White cottony puffs tucked inside stem axils and branch forks. | Sticky residue (honeydew); stems firm. Slight sweet/musty smell. | Mealybug infestation (Pseudococcidae). | Dip a cotton swab in 70% isopropyl alcohol and dab directly onto every white mass to dissolve insect wax. Spray stubborn colonies with ready‑to‑use insecticidal soap away from direct sun. |
| Fine webbing across branch tips; yellow stippling on stem skins. | Stems feel dry, gritty, or sandpaper‑like. Odorless. | Spider mites (Tetranychidae) flourishing in hot, dry, stagnant air. | Isolate the plant. Sponge stems down with cold water and mild castile soap (1 tsp per quart water). Increase room airflow and mist ambient air nearby. Repeat every 5 days for 3 cycles. |

Seasonal Shifts and Overwintering: Moving Euphorbia Indoors
Many indoor growers shift their pencil plants outdoors to patio settings during the summer to maximize solar exposure and spur vigorous growth. However, outdoor plants require careful transition protocols ahead of fall cold snaps to prevent shock and root collapse.
Temperature Thresholds and the Indoor Transition Checklist
Euphorbia tirucalli is frost‑tender (hardy outdoors only in USDA Zones 9 through 11). It cannot tolerate freezing temperatures.
- The 50°F (10°C) Rule: When nighttime temperatures consistently dip below 50°F (10°C), cellular metabolism slows abrupt. If cold temperatures combine with wet soil, root rot can develop within days. Bring containers indoors before local nighttime forecasts hit this threshold.
- Light De‑Acclimation (10‑Day Transition): Moving a plant directly from full outdoor sun to low‑light indoor rooms causes mass shedding of tip leaves, branch yellowing, and growth stunting. Acclimate the plant over 10 days by moving it first into open shade (such as a covered patio) for 4 days, then to a bright porch for 3 days, before finally settling it indoors beside your sunniest south‑facing window.
- Pest Wash‑Down: Before crossing the threshold indoors, thoroughly hose down the branches and inspect every stem joint for hitchhiking spiders, scale, or mealybugs. Drenching the soil with a mild neem oil drench can clear out soil‑dwelling pests before the pot enters living areas.
Winter Dormancy Care: Light, Heat, and Reduced Watering
Once settled indoors for the winter months, your pencil cactus enters semi‑dormancy:

- Maximize Direct Window Light: Give it the brightest indoor location available. If south‑facing window space is limited, supplement with a 30‑watt full‑spectrum LED grow light positioned 12 to 18 inches above the canopy on a 12‑hour daily timer.
- Reduce Irrigation Drastically: During winter, indoor evaporation rates plummet. Water only when the entire pot is bone‑dry and mid‑tier stems exhibit visible dehydration creases—often once every 3 to 5 weeks. When in doubt, wait another week; a pencil cactus tolerates severe winter drought far better than damp soil.
- Withhold All Fertilizer: Do not apply liquid plant foods between October and March. Feeding a dormant succulent forces weak, etiolated winter growth that cannot support its own weight.
- Avoid Thermal Stress: Keep the pot away from cold window glass drafts and direct furnace heating vents. Blasts of forced hot air dehydrate stems unevenly, while drafty windowpanes can drop root‑zone temperatures below safe operational levels.
| Visible Stem / Soil Symptom | Texture & Odor | Probable Cause | Immediate Corrective Action |
|---|---|---|---|
| Lower stem base turns light tan/brown with rough bark. | Hard, rigid, woody. No odor. | Normal physiological corking (natural structural strengthening as plant ages). | None needed. Do not cut or scrape. Maintain current care. |
| Stem base turns blackish-brown, spreading upward; branches collapse. | Mushy, water-soaked, soft. Musty, sour, or rotting odor. | Basal fungal stem rot (Fusarium or Phytophthora) from chronic overwatering. | Emergency triage: Unpot immediately. Cut away all soft, dark tissue until only pristine pale green tissue remains. Let callous 7 days, then root as a new cutting. Discard contaminated soil. |
| Dull green stems show vertical creases and longitudinal shrinking. | Soft and limp to touch, but dry and fibrous (not mushy). Clean earthy odor. | Dehydration / Underwatering (drained root zone or hydrophobic soil). | Submerge the entire pot bottom in a basin of lukewarm water for 30–45 minutes to re‑hydrate hydrophobic soil, then drain thoroughly. Stems re‑plump in 48–72 hours. |
| White cottony puffs tucked inside stem axils and branch forks. | Sticky residue (honeydew); stems firm. Slight sweet/musty smell. | Mealybug infestation (Pseudococcidae). | Dip a cotton swab in 70% isopropyl alcohol and dab directly onto every white mass to dissolve insect wax. Spray stubborn colonies with ready‑to‑use insecticidal soap away from direct sun. |
| Fine webbing across branch tips; yellow stippling on stem skins. | Stems feel dry, gritty, or sandpaper‑like. Odorless. | Spider mites (Tetranychidae) flourishing in hot, dry, stagnant air. | Isolate the plant. Sponge stems down with cold water and mild castile soap (1 tsp per quart water). Increase room airflow and mist ambient air nearby. Repeat every 5 days for 3 cycles. |
FAQ
Why is my pencil cactus dropping its tiny green leaves?
Euphorbia tirucalli produces small, narrow leaves at new branch tips that are temporary and naturally drop as stems mature. As long as the green cylindrical stems remain firm and upright, leaf drop is a normal physiological trait rather than a sign of poor health.
Can I root a pencil cactus cutting directly in water?
Water rooting is not recommended because stagnant moisture prevents proper callousing and causes the toxic latex sap to decompose, rapidly rotting the cutting. Rooting calloused cuttings in a dry, mineral-based succulent mix yields a significantly higher success rate.
How fast does an indoor pencil cactus grow, and how large can it get?
Under bright indoor sunlight, Euphorbia tirucalli can grow 1 to 2 feet per year, potentially reaching 6 feet or taller within a few years if unpruned. In outdoor frost-free climates, it can mature into a 20-to-30-foot tree.
What should I do if a child or pet swallows a piece of pencil cactus?
Immediately wipe any remaining plant material from their mouth with a cool, damp cloth, do not induce vomiting, and contact Poison Control (1-800-222-1222 in the US) or your veterinarian. Ingestion can cause intense burning, drooling, vomiting, and esophageal inflammation requiring professional medical assessment.