
Core corn snake care targets for a healthy beginner setup:
| Care need | Beginner target |
|---|---|
| Adult enclosure | About 4 × 2 × 2 ft, secure and escape-proof |
| Temperature | 85–90°F warm basking area; 72–82°F cool side; thermostat on every heat source |
| Humidity | Generally 40–60%, with a humid hide during shedding |
| Feeding | Frozen-thawed mice sized to the snake’s widest point; every 5–14 days by size |
| Handling | Let a new snake acclimate; wait at least 48 hours after meals |
A reliable corn snake care setup starts with a secure enclosure, a controlled heat gradient, two snug hides, fresh water, and appropriately sized frozen-thawed mice. Plan for an adult enclosure about 4 by 2 by 2 feet, measure temperatures rather than guessing, and use a thermostat with every heat source. Feed according to your snake’s weight and body condition, and let a new snake settle in before handling it. Here’s what to plan for, from setup and routine costs to the first week and signs of illness.
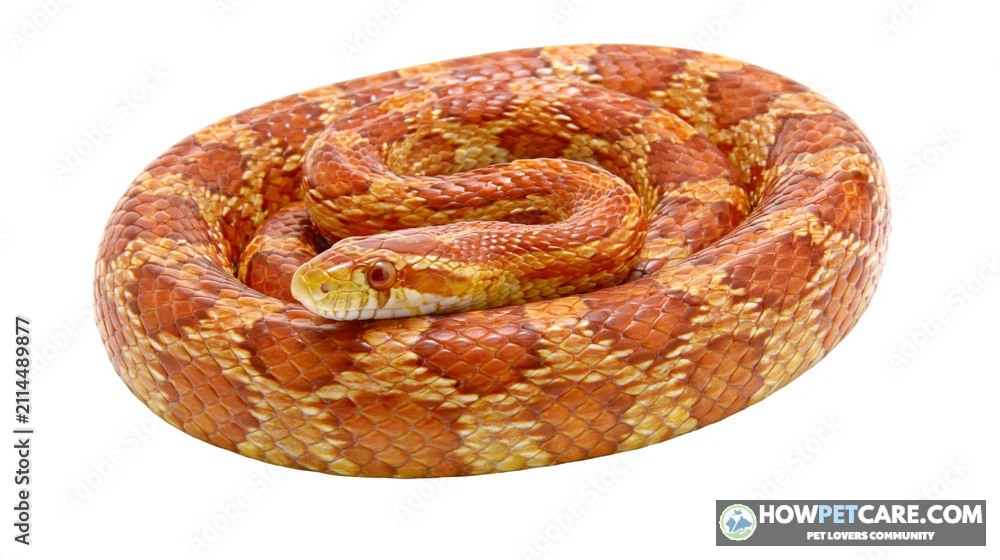
Corn snakes (Pantherophis guttatus) are nonvenomous members of the colubrid family native mainly to the southeastern United States. They can be a manageable choice for a prepared first-time keeper, but they aren’t maintenance-free. They need dependable equipment, appropriate food, and access to an exotic-animal veterinarian. Adults commonly reach 3–5 feet and can live 15–20 years or longer in captivity.
Corn snake care at a glance: the setup and daily routine
Give your snake a warm end and a cool end so it can choose where to rest. Place a snug hide at each end, add a heavy water bowl, and provide enough cover for the snake to feel secure without blocking its movement. Keep a digital thermometer probe on each side and use a hygrometer to check humidity. Temperature targets vary slightly by source and according to whether you’re measuring air or a surface. Aim for a warm basking area near 85–90°F and a cooler area within roughly 72–82°F.
Check temperatures and water daily. Remove waste when you see it, and record meals, sheds, and unusual behavior. Weigh the snake about monthly, especially while it’s growing or if it refuses food. A consistent routine helps you spot gradual changes before they become bigger problems.

Choose an enclosure that fits each life stage and cannot be escaped
A corn snake needs usable floor space, secure ventilation, and places to hide—not a particular number of gallons on a label. Older care sheets sometimes recommend smaller adult tanks, but modern guidance commonly favors an adult enclosure around 4 × 2 × 2 feet. The snake should be able to stretch out, move between warm and cool areas, climb safely, and use both hides without being exposed.
Enclosure size from hatchling to adult
Choose a secure enclosure suited to the individual snake, and upgrade it as the snake grows. A hatchling can start in a smaller, escape-resistant habitat; a juvenile needs more room as its length increases. You can plan for the adult enclosure from the beginning if you can manage its temperature and security. The adult 4 × 2 × 2-foot target is more useful for planning than older gallon recommendations.
| Life stage | Enclosure guidance | Warm-side and cool-side targets | Humidity guidance | Monitoring notes |
|---|---|---|---|---|
| Hatchling | Secure, appropriately sized enclosure with no gaps and room for a full gradient | Warm basking area 85–90°F; cool side about 72–82°F | Generally 40–60% | Use digital probes; make sure the snake can reach both hides |
| Juvenile | Increase floor space as the snake grows; retain secure latches and cover | Same overall gradient; verify actual enclosure readings | Generally 40–60% | Check temperatures after changing heat, décor, or substrate |
| Adult | Plan for about 4 × 2 × 2 ft of usable space | Warm basking area 85–90°F; cool side about 72–82°F | Generally 40–60% | Continue daily checks and monthly weight records |

There’s no need to house corn snakes together. Separate housing makes feeding and health monitoring easier and helps prevent injury.
Substrate, hides, and layout
Aspen bedding is a common, easy-to-clean choice for a standard dry setup. Paper towels can be useful temporarily, such as during quarantine or while monitoring a health concern. Cypress mulch and coconut-based substrates are also options when they suit the enclosure’s humidity and cleaning routine. Avoid cedar and pine: their aromatic oils can be harmful. Avoid sand, too, because it isn’t a suitable general-purpose corn snake substrate. Snakes can swallow loose substrate during feeding, so use tongs and keep the feeding area clean.
Put one snug hide on the warm side and one on the cool side. The snake should be able to touch the sides of a hide while coiled inside; an oversized hide may leave it feeling exposed. Add climbing branches and clutter, securing them so they can’t fall or trap the snake. Place the water bowl where it can’t tip into a heat source, and keep a clear route between the two ends of the enclosure.

Escape-proofing checklist
Inspect every opening before putting the snake in its enclosure. Corn snakes are skilled escape artists, especially when young.
- Test every door, lid, latch, and lock; push gently from inside and outside to confirm nothing lifts or slides open.
- Check ventilation gaps, corners, and cable ports. Any opening large enough for the snake’s head is a concern.
- Secure décor and branches so they can’t shift against a lid or create a climbing route out.
- Confirm the water bowl is stable and cords can’t pull equipment loose.
- Recheck the enclosure after maintenance; a door left slightly ajar is an easy escape route.

Set a measured heat gradient, humidity, and lighting
Corn snakes regulate their body temperature by moving between warmer and cooler areas. A heat gradient means those different temperatures are available at the same time, so the snake isn’t forced to stay at one temperature throughout the enclosure.
Temperature gradient and thermostat setup
Aim for a basking area around 85–90°F and a cool side around 72–82°F. Check the basking surface with an appropriate surface-reading thermometer, and monitor air temperature with digital probes. Don’t assume the thermostat’s display matches the temperature at the snake’s level.
Every heat source needs a thermostat, including an under-tank heater, heat lamp, or radiant heat panel. The thermostat regulates output and helps prevent overheating and burns. Follow the manufacturer’s placement instructions, positioning the control probe to measure the relevant heated area rather than a distant part of the enclosure. Recheck readings after changing the bulb, substrate depth, or layout. Never use an unregulated heat source or a heat rock.

Humidity and shedding support
Keep humidity generally around 40–60%. Use a hygrometer rather than judging by feel, and don’t let the whole enclosure remain wet. If the air is persistently outside the target range, check ventilation, water spills, substrate moisture, and room conditions before making a large change.
During shedding, provide a humid hide: a snug hide containing lightly damp, not soaked, sphagnum moss or another safe moisture-holding material. The snake’s eyes may look cloudy or bluish before a shed. Don’t pull skin off; the troubleshooting section explains how to support a snake with stuck shed safely.

Lighting and day-night cycle
Provide a consistent day-night cycle, with visible light during the day and darkness at night. Low-level UVB lighting is a modern husbandry option. It supplies ultraviolet-B radiation, which supports normal vitamin D production. UVB guidance varies by lamp, distance, mesh, shade, and snake coloration. One current care reference lists a UVI target of 2.0–3.0 for corn snakes. UVI means the ultraviolet index at the animal’s basking position. Follow the fixture’s distance and installation guidance, and provide shaded areas where the snake can retreat. If you’re unsure how to set it up, ask an exotic veterinarian or qualified reptile specialist. Don’t leave bright lights on overnight.

Feed by snake weight, prey size, and life stage
Base a repeatable feeding schedule on the snake’s weight and the width of its prey, not age alone. Frozen-thawed mice are the usual prey; weigh the snake about monthly while it’s growing. Prey should be close to the width of the snake’s widest point and no more than about 1.5 times that width. Body shape matters too: a healthy snake shouldn’t become markedly thin or develop excess rolls.
Feeder size by snake weight
Use the ranges below as starting points, not rigid rules. Mouse weights vary by supplier, and the same prey label can refer to different sizes. Give priority to the prey-width rule and your snake’s body condition. Pinkies are newborn mice; fuzzies are older, furred juveniles; hoppers are mobile juvenile mice.
| Prey type | Approximate prey weight | Approximate snake-weight range | Typical feeding interval | Adjustment notes |
|---|---|---|---|---|
| Pinkie | 1–3 g | 5–25 g | Every 5–7 days | Move up when one pinkie no longer leaves a modest meal bulge and the next size fits the width rule |
| Fuzzy | 4–7 g | 20–60 g | About every 7 days | If two fuzzies are regularly needed, assess whether one hopper is suitable |
| Hopper | 7–12 g | 50–110 g | About every 7 days | Track body condition and growth |
| Weaned or small adult mouse | 12–18 g | 100–200 g | Every 7–10 days | Growing juveniles may need the shorter interval; adjust to condition |
| Adult mouse | 18–30 g | 180–300 g | Every 10–14 days | Many adults maintain condition on a longer interval |
| Jumbo adult mouse or rat pup | 25–40 g | 300 g and up | About every 14 days | Most corn snakes can be fed appropriately sized mice; do not size up automatically |
The weight ranges overlap because snakes grow at different rates. Don’t offer a larger mouse to compensate for a skipped meal. If your snake is losing weight or its body shape changes, consult an exotic veterinarian rather than repeatedly changing prey size.

Feeding schedule and frozen-thawed prey
Hatchlings and smaller juveniles typically eat more often than adults. A practical starting schedule is every 5–7 days for pinkies, around weekly for many fuzzy and hopper meals, and every 7–14 days for larger prey and adults. Adjust the interval based on the snake’s weight trend and body condition. If growth or weight concerns you, ask a veterinarian for advice.
If a meal is refused, check the likely causes in this order before worrying:
- Enclosure temperatures and a working thermostat.
- Pre-shed signs such as cloudy eyes or dull skin.
- Recent stress: a new home, frequent handling, or a busy location.
- Prey that isn’t fully thawed, warmed through, or correctly sized.
Wait about a week before offering again rather than retrying daily; the troubleshooting section walks through each step in detail.
Thaw frozen prey safely in a sealed bag in warm water. Before feeding, make sure it’s fully thawed and warmed through. Don’t use a microwave. Offer the mouse with feeding tongs, not your fingers, and remove uneaten prey after a short feeding attempt rather than leaving it in the enclosure. Wash your hands and clean food-preparation surfaces after handling prey.

After-meal handling and safe storage
Leave the snake alone for at least 48 hours after a meal. Handling too soon can stress it and may contribute to regurgitation. Store frozen feeders according to package instructions, keep them separate from human food where possible, and never refreeze prey that has thawed.
Budget for the snake before choosing a setup
The purchase price is only one part of corn snake care. Enclosure size, safe heating, and veterinary access are major costs to plan for. The following are approximate U.S. retail planning ranges for 2026, not guaranteed quotes. Prices vary by region, enclosure material, and whether you buy new or used, so confirm local prices before committing.
Startup and monthly cost breakdown
| One-time item | Estimated cost | Notes |
|---|---|---|
| Captive-bred corn snake | $30–$250+ | Common animals may cost less; price varies by age and morph—a selectively bred color or pattern variant |
| Adult enclosure, about 4 × 2 × 2 ft | $250–$450 | A secure adult enclosure is a major upfront expense |
| Heat source and fixture | $25–$60 | Choose an appropriate heat lamp, panel, or other suitable source |
| Thermostat | $30–$70 | Required for every heat source |
| Digital thermometers and hygrometer | $15–$30 | Measure conditions at the snake’s level |
| Hides, water bowl, branches, and clutter | $35–$90 | Include two hides and stable furnishings |
| Initial substrate | $15–$30 | Cost depends on type and enclosure size |
| Initial exotic-vet wellness exam | $60–$120 | Local examination fees vary; ask clinics for current pricing |
| Typical planning total | About $460–$1,055 | Range depends on snake price, enclosure, and local veterinary fees |
| Recurring monthly item | Estimated monthly cost | Notes |
|---|---|---|
| Frozen feeders | $5–$15 | Depends on prey size, quantity, and supplier |
| Electricity for heat and lighting | $5–$15 | Varies with climate, equipment, and utility rates |
| Substrate replacement | $5–$10 | Amortized estimate; cleaning frequency varies |
| Veterinary savings reserve | $15–$25 | Savings are not a substitute for available emergency funds |
| Typical monthly planning total | About $30–$65 | Does not include an unexpected illness or enclosure replacement |
These figures are planning estimates, not a promise that care will stay within the monthly total. Keep additional funds accessible for an unexpected veterinary visit, tests, or treatment. Before bringing the snake home, ask an exotic clinic about examination and emergency fees.
Standard versus bioactive: cost, effort, and tradeoffs
A standard setup uses a cleanable substrate and removable décor. A bioactive setup adds soil, live plants, leaf litter, and a cleanup crew—small organisms intended to help break down waste. Both approaches still require observation, spot-cleaning, and appropriate temperature and humidity control.
| Factor | Standard setup | Bioactive setup |
|---|---|---|
| Estimated startup cost | About $460–$1,055 for the complete setup above; simpler juvenile setups may cost less initially | Usually higher because of soil layers, plants, cleanup crew, and lighting; price varies substantially |
| Typical ongoing costs | Regular substrate replacement and cleaning supplies | Occasional plant or cleanup-crew replacement; soil and plants may need troubleshooting |
| Maintenance effort | Straightforward; waste and urates—the solid part of a reptile’s urine—are easy to find and remove | More planning and setup; a stable system can reduce some substrate changes |
| Health monitoring | Easier to inspect stool, urates, and possible mites | Waste can be harder to locate in soil, which may complicate monitoring |
| Humidity management | Easier to keep a relatively dry enclosure | Moist soil can raise humidity and may be harder to correct |
| Best fit | Beginners, quarantine, and keepers who value clear monitoring | Keepers comfortable managing plants, soil moisture, and a living system |
A standard setup is the simpler starting point for most first-time keepers. You can see waste clearly while learning what’s normal for your snake. A bioactive enclosure may be a project to consider later, but it isn’t a shortcut to effortless care. Startup totals depend on the animal and equipment you choose, so use the comparison as a budget framework rather than a fixed price.

Use a first-week plan to reduce stress and confirm the setup
Prepare the enclosure before the snake arrives. The first week is for acclimation and checking that the environment works, not for frequent handling or showing the animal to visitors.
Before the snake comes home
Run the empty enclosure for several days. Check the warm and cool areas at different times of day, test the thermostat, verify humidity, and make sure both hides and the water bowl are stable. Complete the escape-proofing inspection before the snake goes inside. If readings aren’t stable, resolve the issue before bringing the animal home.
Arrival through the first feeding
Use this day-by-day plan as a guide. A snake that’s still settling in may need more time before its first meal.
-
Days -7 to -3: run the enclosure
Assemble the enclosure and run it empty. Check the warm and cool sides, basking area, humidity, and thermostat operation morning and evening. Adjust the setup until readings are stable.
-
Day -2: inspect every opening
Test doors, lid, latches, vents, and cable ports. Secure branches and décor, and confirm the water bowl can’t tip. Fix any opening the snake could squeeze through.
-
Day 0: transfer and leave the snake alone
Place the snake in its enclosure with minimal handling. Provide fresh water and access to both hides, then give it quiet time to explore.
-
Days 1–3: observe discreetly
Check temperature, humidity, and water without unnecessary disturbance. Record readings and behavior. Hiding while acclimating is common; continue checking that the gradient is correct.
-
Days 4–5: offer one suitable meal if settled
Offer one appropriately sized frozen-thawed mouse with tongs. If the snake refuses, remove the prey and don’t repeat attempts every day; use the troubleshooting sequence below.
-
Days 6–7: record the result and keep monitoring
Record whether the snake ate, the prey size, and the date. If it ate, wait at least 48 hours before a short handling session. If it refused, check conditions and stressors before trying again on a sensible schedule.
First-week checklist
- ☐ Stable temperatures and humidity confirmed before arrival.
- ☐ Thermostat tested and connected to the heat source.
- ☐ Secure latches, ventilation, and cord ports checked.
- ☐ Two snug hides, fresh water, and stable furnishings in place.
- ☐ Feeding and measurement log started.
- ☐ Handling postponed while the snake acclimates and for at least 48 hours after a meal.

Troubleshoot food refusal, shedding, and health changes
A single refused meal isn’t automatically an emergency, particularly after a move or near a shed. Check likely causes in order, change one condition at a time, and avoid repeatedly offering food. Never force-feed or attempt home treatment that could injure the snake.
Food-refusal decision tree
- Verify heat first. Check warm and cool readings with digital instruments, and confirm that the thermostat and heat source work. The thermostat reading alone doesn’t prove the snake’s environment is correct.
- Look for pre-shed signs. Cloudy or bluish eyes and dull skin can accompany a shed cycle. Appetite may dip; wait for the shed to finish and keep a suitable humid hide available.
- Review stress and recent changes. A new home, frequent handling, a busy location, or missing snug hides can suppress appetite. Give the snake quiet time and avoid unnecessary enclosure disturbance.
- Check the prey. Make sure the mouse is fully thawed, warmed through, appropriately sized, and offered with tongs in a calm setting. Don’t move up a prey size to make up for a missed meal.
- Consider seasonal changes without changing heat. Some adult snakes eat less during cooler months, but that doesn’t mean you should lower enclosure temperatures or deliberately induce brumation. Brumation is a seasonal period of reduced activity; don’t attempt it without informed veterinary guidance.
- Log and reassess. Record date, prey type and size, temperatures, shed status, and weight. After correcting a likely issue, wait about a week before one further offer instead of trying every day.
A refusal accompanied by weight loss, breathing signs, regurgitation, swelling, or unusual weakness needs veterinary advice. If a juvenile refuses for several weeks or an adult refuses for an extended period, contact an exotic veterinarian rather than relying on a fixed fasting deadline. Age, body condition, and health all matter.
Normal shed and safe stuck-shed support
As part of the normal shedding process, the skin can look dull and the eyes may appear cloudy or blue before a shed. The eyes may clear again before the old skin comes off. Provide fresh water and a humid hide, and check that enclosure humidity remains in range. After shedding, gently inspect the animal for retained skin, especially around the tail tip and the eye caps—the transparent scales covering the eyes.
Don’t pull shed skin, peel it from the eyes, or use tools to scrape it off. If a small area remains, maintain suitable humidity and provide access to the humid hide. If shed is constricting the tail, covering an eye, repeatedly retained, or accompanied by irritation or injury, contact an exotic veterinarian for a safe assessment.

Popping and probing are techniques used to determine a snake’s sex, but incorrect use can injure the animal. Don’t try them at home; ask an experienced reptile veterinarian or qualified professional. Never force-feed a corn snake without veterinary direction.
When to call an exotic veterinarian
Seek prompt veterinary care for breathing difficulty, open-mouth breathing, wheezing, repeated regurgitation, an injury or burn, marked swelling, or sudden severe weakness. Don’t try to manage these signs by changing food or waiting for the next shed.
Arrange veterinary advice for persistent refusal, noticeable weight loss, repeated incomplete sheds, retained skin affecting the eyes or tail, ongoing abnormal behavior, or suspected mites. You can monitor a brief refusal in an otherwise alert snake while checking husbandry, but illness signs or a declining weight trend change the situation. Use a veterinarian who treats reptiles, and don’t give medication or attempt procedures without their guidance.
Choose a source and bring your snake home responsibly
Choose a seller or rescue that can answer basic questions and provide a clear history. A reputable breeder may have feeding and hatch information, while a rescue may know the animal’s behavior and prior care. Pet stores can vary, so ask for records rather than assuming the history is complete. Avoid a seller who can’t explain what the snake eats or how it has been kept.
Ask for the hatch date or estimated age, recent feeding and shedding dates, prey type and size, and any veterinary or treatment records. It helps to know what a healthy snake looks like when you observe whether the snake appears alert and whether its eyes, skin, breathing, and body condition raise concerns. Arrange an initial examination with an exotic-animal veterinarian, particularly if the history is incomplete.
Keep a new snake quarantined from other reptiles in a separate, easy-to-clean enclosure. Use separate equipment, wash your hands between animals, and ask your veterinarian how long to maintain separation based on your household and the snake’s health history. Check your city, county, and state rules before acquisition; ownership restrictions and permit requirements vary by location.
Before bringing a corn snake home, confirm that the enclosure is ready, the thermostat works, a reliable food source is available, and you can reach an exotic veterinarian. If those basics and the long-term costs fit your situation, follow the first-week plan and keep a simple record of temperatures, meals, sheds, and weight.

| Prey Type | Approximate Prey Weight | Approximate Snake Weight Range | Typical Feeding Interval | Adjustment Notes |
|---|---|---|---|---|
| Pinkie | 1–3 g | 5–25 g | Every 5–7 days | Move up when one pinkie no longer leaves a modest meal bulge and the next size fits the width rule |
| Fuzzy | 4–7 g | 20–60 g | Every 7 days | If two fuzzies are regularly needed, assess whether one hopper is suitable |
| Hopper | 7–12 g | 50–110 g | Every 7 days | Track body condition and growth |
| Weaned or small adult mouse | 12–18 g | 100–200 g | Every 7–10 days | Growing juveniles may need the shorter interval; adjust to condition |
| Adult mouse | 18–30 g | 180–300 g | Every 10–14 days | Many adults maintain condition on a longer interval |
| Jumbo adult mouse or rat pup | 25–40 g | 300+ g | Every 14 days | Most corn snakes can be fed appropriately sized mice; do not size up automatically |
FAQ
How long do corn snakes live, and how big do they get?
Corn snakes commonly live around 15–20 years in captivity, and some live longer with good care. Adults are often about 3–5 feet long, though size varies by individual.
Are corn snakes good pets for beginners?
They can be a good fit for beginners who can provide a secure enclosure, controlled heat, appropriate feeding, and long-term veterinary care. They are not maintenance-free, and their lifespan makes them a substantial commitment.
Can I tell whether a corn snake is male or female by looking at it?
Not reliably; external appearance is not a dependable way to sex a corn snake. Popping and probing can injure the animal if done incorrectly, so have an experienced reptile veterinarian or qualified professional determine sex.
Do corn snakes bite?
Corn snakes are nonvenomous and generally docile, though a startled or stressed snake may nip defensively. Such bites are typically minor, and calm, consistent handling after the acclimation period reduces defensive behavior.
Can two corn snakes live together in one enclosure?
There’s no need to house corn snakes together, and separate housing is recommended. Keeping them apart makes feeding and health monitoring easier and helps prevent injury.