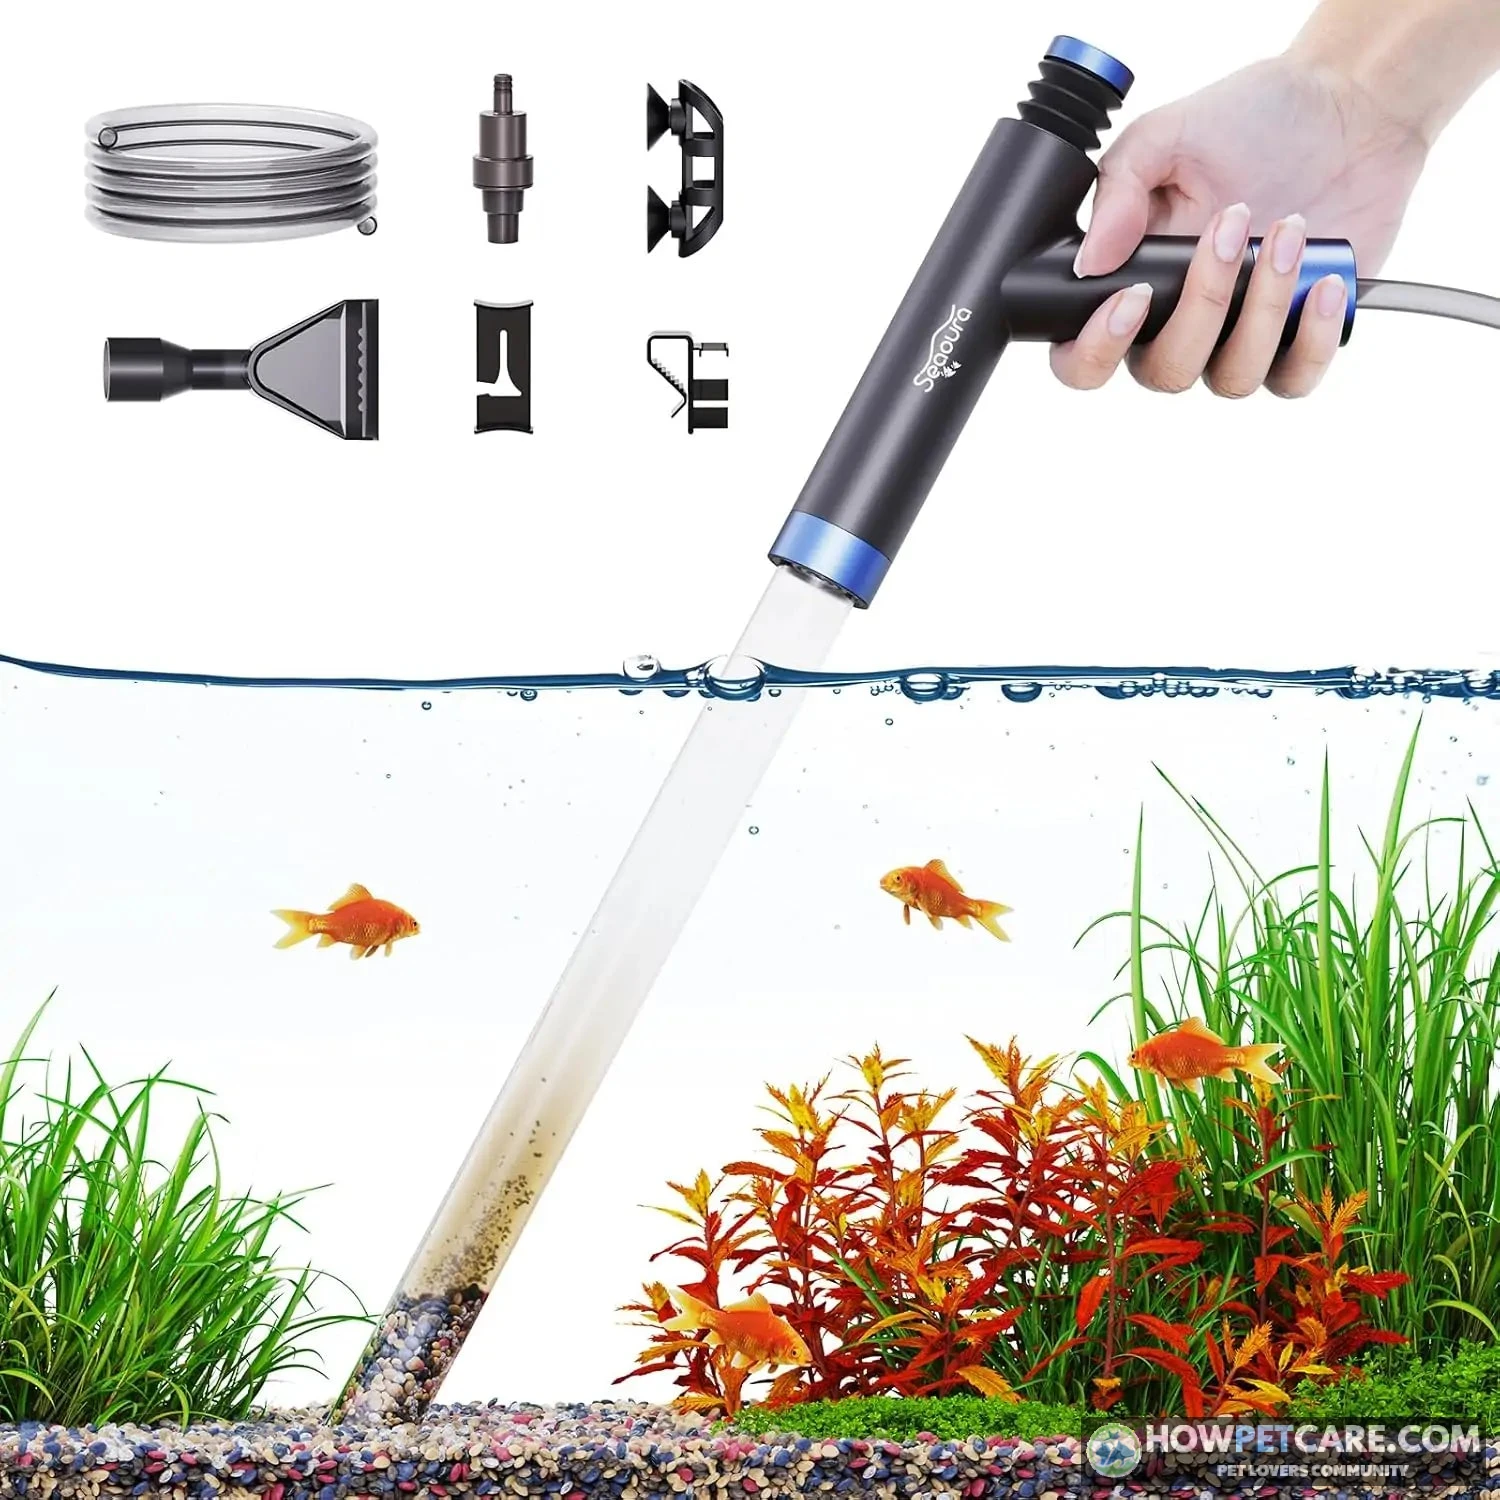

To clean a fish tank safely without removing the fish, follow these steps:
- Unplug the heater and filter before lowering the water line.
- Scrape algae off the interior glass panes.
- Siphon out 20–25% of the water while vacuuming waste from the substrate.
- Swish clogged filter media only in old siphoned tank water, never tap water.
- Refill slowly with fresh tap water conditioned for chlorine and temperature-matched within 1–2°F.
- Restart equipment and confirm proper circulation.
How to Clean a Fish Tank: The Safe 8-Step Routine
Leave your fish in the aquarium during routine maintenance. Never catch them, shift them to bowls, drain the tank, or swap out all the water at once. Instead, swap out 20–25% of the water, lift waste with a siphon gravel vacuum, wipe algae from the glass, and leave your established biological filter alone. This keeps handling stress low and shields your nitrogen cycle from collapse.
An aquarium is not supposed to be sterile. Beneficial bacteria colonize the filter media, gravel, decorations, and other submerged surfaces rather than floating freely through the water column. These microbes convert toxic ammonia into nitrite and then into nitrate. Knowing how to clean a fish tank correctly means pulling out excess waste while leaving this living biological system untouched.
Keep soap, detergent, disinfectants, household glass cleaners, and untreated tap water away from anything that touches aquarium water. Soaps leave surfactant residues on porous materials, and even tiny traces can sear fish gills or wipe out aquatic organisms.
Why a full teardown is usually dangerous
Emptying 100% of the water and stripping a tank down destroys mature biological colonies, subjects fish to sudden shifts in temperature and water chemistry, and causes intense capture stress. While retaining at least 50% of old water was historically suggested to protect beneficial microbes, the primary bacterial colonies live directly on the filter media, gravel, and decor. Regular maintenance must preserve those surfaces rather than counting on old water alone.
Large water changes belong in emergencies—such as accidental chemical contamination, medication clearance, critical ammonia or nitrite spikes, or explicit veterinary guidance. They are not appropriate for standard upkeep. If your setup is brand new, cycling is a completely separate process; the steps below apply to an established freshwater aquarium.
Supplies You Need—and What Must Never Touch the Tank
Essential tools for beginners
Set aside a dedicated set of tools used exclusively for your fish:
- A dedicated bucket that has never held soap, chemicals, paint, or cleaning products
- A siphon gravel vacuum with hose
- An aquarium-safe algae scraper or pad
- A soft brush for decorations
- A clean towel for drips
- Water conditioner or dechlorinator that treats chlorine and chloramine
- A thermometer
- A freshwater test kit for ammonia, nitrite, nitrate, pH, and temperature
- A second small bucket for rinsing filter media in old aquarium water

Expensive brand-name gadgets are unnecessary. Solid technique matters far more than premium gear. If you run a small aquarium, select a siphon narrow enough to let you control or pinch off the flow before draining too much water.
Soap and household chemicals to avoid
Keep dish soap, laundry detergent, disinfectants, scented sponges, bleach residue, and standard glass cleaners far away from your tank. Do not wash gravel, filter media, plants, or ornaments with soap. Porous rocks and plastic decorations readily absorb chemicals and leach them back into the water later.
Aquarium-safe glass cleaner belongs on outer panes only. Spray it onto a rag away from the tank rather than directly at the glass. If hard mineral crust builds up on a removable, nonporous item, soak it in plain white vinegar outside the tank, then rinse it thoroughly with clean water before putting it back. Never pour vinegar into an occupied aquarium.
Algae itself is not inherently dangerous. A light film gives grazing fish food and takes up dissolved nutrients. Scrape it away when it blocks your view, smothers plant leaves, clogs intakes, or signals an imbalance between light and nutrients.
Preparation and electrical safety
Before reaching into the tank with your hands or tools, unplug the heater, filter, air pump, powerheads, and any other submerged devices. Glass heaters can shatter if exposed to air while hot, and filter motors can burn out or overheat when running dry. Let a warm heater rest submerged for about 15 minutes to cool down before lowering the waterline.
Ensure electrical cords dip below the wall outlet in a drip loop so moisture cannot track into the socket. Spread towels on the floor and weigh down your waste bucket so the siphon hose cannot whip out mid-drain.

Clean the Glass, Plants, and Decorations Without Removing Fish
Clean the glass first so the siphon can capture loosened algae and floating debris later. Pick a scraper built for your tank material. Use a rigid blade for glass, but never touch acrylic panels with metal. If using a magnetic glass cleaner, check the inner pad for trapped gravel grains that could gouge the walls.
Move slowly around fish and plants. Avoid chasing fish with scrapers or tubes. Most fish slip quietly out of the way on their own, sparing them the panic and physical damage of being netted into a separate container.
How to clean green algae off fish tank glass
A soft green film wipes away easily with a tank-safe pad or magnetic cleaner. Green spot algae is much tougher, forming hard dots across panes and slow-growing plant leaves. Scrape it off glass with a firm plastic or metal blade, then cut back on excess lighting and overfeeding rather than trying to sterilize the environment.
Scrape downward so dislodged flakes drift toward the bottom. Keep the scraper away from the substrate line so you do not drag gravel against the glass. For external smudges, wipe the panes with a damp towel or apply glass cleaner directly to a cloth away from the water.

Safe cleaning for plants and aquarium decor
Rub broad plant leaves gently between your fingers or with a soft, tank-only pad. Brush ornaments without removing them if you can. If a piece requires heavy scrubbing, pull it out and brush it in a bucket of siphoned tank water. Avoid scrubbing every surface clean: healthy biofilms and attached microbes form the foundation of your tank’s biological stability.
If decorations are coated in stubborn growth, clean only the dirtiest pieces during a single session. Stripping every surface at once risks destabilizing the tank. Scrub artificial ornaments firmly with a stiff brush, but prune heavily damaged live leaves with plant shears rather than scrubbing them raw.

How to Vacuum Gravel and Fine Sand Without Losing Substrate
Vacuuming pulls out fish waste, uneaten pellets, and rotting plant matter before they decompose into ammonia and nitrate. Your method will differ depending on whether you keep gravel or fine sand.
Water flow carries light waste upward much faster than dense substrate. In gravel, the siphon tube sinks into the bed, tumbling stones while waste floats up the hose. In fine sand, plunging the tube sucks up the sand bed entirely. Hovering just above the surface solves that problem.
The safe way to clean gravel in a fish tank
On medium or coarse gravel, push the tube straight down into a 2–3-inch patch. Let the stones tumble within the cylinder. Light detritus rises through the siphon while the heavier gravel drops back down. As the water in the cylinder clears, kink the hose to stop suction, lift the tube, and move to an adjacent patch.
In fine gravel, push only 1–2 inches into the bed with a quick plunge-and-lift motion. Pinch the hose slightly if stones climb more than halfway up the tube. Work methodically, but stop once you hit your 20–25% water removal limit. The gravel bed does not need to look brand new.

The hover-and-swirl method for fine sand
Hold the siphon opening 1–2 inches above the sand bed. Move it in small circles to kick up a gentle vortex. This motion pulls loose debris into the water column without dragging sand into the hose.
If sand grains get sucked up, pinch the hose or raise the vacuum slightly. Dense sand grains will fall back down while light waste keeps flowing into the bucket. Never shove the vacuum into fine sand or drag it sideways across the bed.

In planted tanks or dense root zones, hover over open spots and steer clear of root networks. Clean sections in rotation across different weeks instead of stirring the whole floor. Raking deep into a planted substrate clouds the water column and unearths trapped organic waste.
Gravel vs. sand vacuuming techniques
| Substrate type | Vacuum position | Recommended motion | Flow-control method | Mistake to avoid |
|---|---|---|---|---|
| Medium or coarse gravel | Push vertically into one 2–3-inch section | Hold still while gravel tumbles, then lift and move | Pinch or kink the hose before lifting | Dragging horizontally and pushing waste deeper |
| Fine gravel | Insert only the lower 1–2 inches | Use short plunge-and-lift movements | Partially pinch the hose | Holding full flow until gravel is siphoned away |
| Fine sand | Hover 1–2 inches above the surface | Use a small circular swirl | Raise the tube or briefly pinch the hose | Plunging into the sand bed |
| Planted or compacted substrate | Hover over exposed areas | Clean lightly and rotate sections | Reduce flow near roots | Stirring the entire bed at once |
Clean Aquarium Filter Media Without Killing Beneficial Bacteria
Clean your filter media only when the outflow slows down, the intake strainer clogs, or sludge builds up heavily. A brown, discolored sponge or ceramic ring is completely normal. The objective is restoring water flow, not scouring media back to factory condition.
The exact siphoned-water swish method
- Unplug before water levels fall. Disconnect the filter and heater before siphoning. Keep a warm heater submerged while it cools.
- Reserve old aquarium water. At the beginning of the water change, siphon 1–2 gallons into a dedicated aquarium-only bucket. Set it aside before vacuuming dirty substrate into the main waste bucket.
- Clean media gently. Place reusable mechanical sponge and biological media in the reserved water. Swish each piece two or three times. If a sponge is clogged, squeeze it gently two or three times—only enough to restore flow.
- Preserve mature surfaces. Never rinse biological filter media under untreated tap water. Chlorine and chloramine can damage the nitrifying bacteria that process ammonia and nitrite. Never let biological media dry, and do not replace every cartridge, sponge, and ceramic medium together.
- Restore flow promptly. Clean the intake or impeller separately if buildup restricts it. Reinstall damp media, fill or prime the filter as its design requires, and restart it. Confirm steady outlet flow within five minutes.
Mechanical sponges trap physical waste and can handle a firmer squeeze. Biological media, such as ceramic rings, sintered glass, or porous lava rock, must be rinsed gently and preserved. Chemical media like activated carbon exhausts over time and requires periodic replacement, but changing carbon should never involve discarding your biological media.
When a filter pad disintegrates, swap it out while leaving existing biological rings intact. Never let a disconnected filter sit stagnant for hours without oxygen. Get it rinsed, reassembled, and running again quickly.

Never rinse biological filter media under chlorinated tap water. Swish or gently squeeze it in water removed from the aquarium, then return it damp to the filter.
Refill With Dechlorinated, Temperature-Matched Water
Always condition tap water before letting it touch your fish. Run chemical tests on your municipal supply during your initial fish tank setup and whenever your local utility issues water reports. Municipal supplies fluctuate in temperature, pH, mineral hardness, chlorine, and chloramine concentrations.
How to match replacement-water temperature
Check temperatures with an accurate thermometer instead of your hand. Keep the fresh water within 1–2°F, or about 0.5–1°C, of the aquarium water. Swings wider than 2°F trigger thermal shock, especially when refilling smaller aquariums quickly.
If the tank sits at 78°F, your new water must read between 76°F and 80°F. Blend hot and cold tap water until the thermometer hits that window. Avoid drawing water from old, sediment-heavy household water heaters, and never guess temperatures by feel.
When and how to dose dechlorinator
Base your conditioner dose on the net water volume rather than outer tank dimensions, accounting for displaced substrate and hardscape. Use this simple formula:
Replacement gallons = actual aquarium water volume × planned water-change percentage
A setup holding 18 gallons of actual water requires 4.5 gallons for a 25% change. If the conditioner instructions call for 5 mL per 10 gallons, add 2.25 mL for 4.5 gallons. Measure doses using a small syringe or graduated medicine cup instead of an imprecise bottle cap.
Follow the dosing instructions on your conditioner bottle. When preparing water in buckets, stir the conditioner into each bucket before pouring it into the tank. Direct-fill hose attachments usually require dosing the full aquarium volume into the tank before refilling starts. Always verify that your water conditioner neutralizes chloramines alongside standard chlorine.

Safe refilling and equipment restart
Pour fresh water slowly over an upturned saucer, floating bag, or large rock to break the current and avoid digging up the substrate. Bring the waterline to its proper height, then confirm that the heater is fully submerged before plugging it in. Never fire up a glass heater while it sits exposed to the air.
Fill the filter box if needed, start the motor, and check for steady return flow. Let the system run for 30–60 minutes to stabilize before making any further adjustments—remembering that regular maintenance does not require netting fish out in the first place.

Identify Algae Before Choosing a Cleaning Method
Identify the specific algae before treating it. Physical removal is safer than pouring algaecides into the tank, which can deplete dissolved oxygen, harm delicate plants, kill invertebrates, or trigger dangerous water chemistry swings without addressing root causes.
| Growth type | Typical appearance | Common location | Manual removal method | Underlying condition to check |
|---|---|---|---|---|
| Brown diatoms | Soft brown or rust-colored film | Glass, decor, sand, newer surfaces | Wipe with a pad and siphon loosened material | Available silicates, excess light, immature conditions |
| Green spot algae | Hard green dots or patches | Glass and slow-growing leaves | Use a suitable rigid scraper on glass | Excessive light and nutrient imbalance |
| Black beard algae | Coarse dark tufts or short bristles | Hardscape, equipment, plant edges | Scrub hardscape; trim badly affected leaves | Flow, light, nutrients, and inconsistent maintenance |
| Cyanobacteria | Slimy green, blue-green, or dark mat | Sand, substrate, low-flow areas | Siphon sheets out without spreading them | Dead zones, excess nutrients, and poor circulation |

Brown diatoms versus green spot algae
Brown diatom coatings are soft and wipe away with light pressure. They typically appear in newly set up tanks and clear up as the system matures. Wipe them with a pad and siphon the floating film away. Green spot algae clings tightly, requiring a sturdy plastic or razor scraper depending on whether your walls are acrylic or glass.
Do not tear your tank down over brown film. Wipe away visible patches, check your daily lighting schedule, feed conservatively, and maintain consistent weekly water changes.
Black beard algae on plants and hardscape
Black beard algae develops as stubborn, bristly dark tufts that will not wipe off with a pad. Take out affected rocks or wood and scrub them in a bucket of siphoned tank water, then clip back heavily colonized plant leaves. Improve water flow and balance lighting periods. Do not strip the aquarium bare trying to eradicate every hair.
Cyanobacteria mats and recurring dead zones
Cyanobacteria is a photosynthetic bacterial sheet rather than a true algae. Siphon the thick sheets out in complete pieces, improve water movement across stagnant dead spots, and remove accumulated organic sludge. If it reappears, fix your underlying filtration flow and waste accumulation instead of endlessly scrubbing the gravel.
| Task or Issue | Category | Recommended Action / Method | Tools or Supplies Needed | Key Risk or Mistake to Avoid |
|---|---|---|---|---|
| Medium or coarse gravel vacuuming | Substrate Vacuuming | Push tube vertically into one 2-3 inch section, hold still while gravel tumbles, then lift and move | Siphon gravel vacuum with hose | Dragging horizontally and pushing waste deeper; removing more than 20-25% water limit |
| Fine gravel vacuuming | Substrate Vacuuming | Insert lower 1-2 inches using short plunge-and-lift movements, partially pinching hose if needed | Siphon gravel vacuum with hose | Holding full flow until gravel is siphoned away |
| Fine sand substrate cleaning | Substrate Vacuuming | Hover 1-2 inches above surface using a small circular swirl motion to kick up loose debris | Siphon gravel vacuum with hose | Plunging into the sand bed or dragging sideways across the bed |
| Planted or compacted substrate cleaning | Substrate Vacuuming | Hover over exposed areas, clean lightly, and rotate sections across different weeks | Siphon gravel vacuum with hose | Stirring or raking the entire bed at once, which unearths trapped organic waste |
| Cleaning Filter Media | Filter Care | Siphon old aquarium water into a bucket, swish sponge/biological media 2-3 times in it gently, and reinstall damp media promptly | Small bucket, old aquarium water | Rinsing media under untreated tap water, letting biological media dry, or replacing all filter media together |
| Refilling Replacement Water | Maintenance / Water Change | Condition replacement water, match temperature within 1-2°F, and pour slowly over an upturned saucer, floating bag, or large rock | Thermometer, water conditioner/dechlorinator, bucket, syringe/medicine cup, upturned saucer/bag/rock | Using untreated tap water, causing thermal shock from temperature swings, or digging up substrate with strong current |
| Brown diatoms | Algae Removal | Wipe with a pad and siphon loosened material | Aquarium-safe algae pad, siphon vacuum | Tearing down the tank over brown film; relying on algaecides |
| Green spot algae | Algae Removal | Use a suitable rigid scraper on glass; cut back on excess lighting and overfeeding | Rigid plastic or metal scraper (for glass) | Using metal blades on acrylic panels or dragging gravel grains against glass |
| Black beard algae | Algae Removal | Scrub hardscape in a bucket of siphoned tank water; trim badly affected plant leaves | Soft/stiff brush, bucket of siphoned tank water, plant shears | Stripping the aquarium bare trying to eradicate every hair; scrubbing live leaves raw |
| Cyanobacteria | Algae Removal | Siphon sheets out in complete pieces without spreading them; improve circulation and water flow | Siphon hose | Spreading sheets during removal or endlessly scrubbing gravel without fixing flow/waste causes |
| Gasping or rapid gill movement during refill | Troubleshooting | Add correctly conditioned, temperature-matched water if needed; restore aeration and test water | Water conditioner, thermometer, test kit | Failing to check chlorine coverage or water temperature |
| Sudden loss of balance or frantic swimming | Troubleshooting | Test immediately, increase safe aeration, and avoid another full teardown | Freshwater test kit (pH, temperature, chlorine, ammonia) | Performing another full water change or teardown |
| Gasping, clamped fins, hiding, or lethargy the next day | Troubleshooting | Test water parameters first, perform an appropriate conditioned partial water change, and restore mature media | Test kit (ammonia and nitrite), water conditioner | Ignoring damaged biological media or failing to run parameter tests |
| Cloudy water without distress | Troubleshooting | Confirm filtration is running properly, reduce feeding, and test water if cloudiness persists | Freshwater test kit (ammonia, nitrite) | Assuming cloudiness is harmless if fish show distress; overfeeding during cloudiness |
| Fish missing after decor movement | Troubleshooting | Inspect the tank immediately, check behind equipment/decorations and inside filter compartments, and restore safe circulation | Not in source | Leaving decor pushed against glass or intake without checking for trapped fish |
Post-Cleaning Safety Check: Prevent Fish Deaths in the Next 48 Hours
Fish losses 24–48 hours after maintenance point to ammonia or nitrite poisoning caused by biological filter media that was rinsed in chlorinated water, scrubbed too hard, left out to dry, or starved of oxygen. Distress seen during refilling points directly to chlorine burns or temperature shock. Always run water tests rather than guessing.
The five-minute equipment and fish check
- Confirm the heater is fully submerged and operating.
- Confirm the filter chamber is filled or primed and water is returning to the tank.
- Check for surface ripples and air-stone bubbles.
- Verify that the tank temperature remains within 1–2°F of its pre-cleaning temperature.
- Check that no fish is trapped behind moved decorations, inside a filter compartment, or against an intake.
- Look for leaks, wet cords, and missing drip loops.
- Skip feeding for the next 24 hours after a major cleaning or whenever fish appear stressed.
- Recheck circulation, surface movement, heater status, and swimming behavior five minutes after restart.

Post-cleaning fish distress diagnostic guide
| Observed symptom | Likely cleaning mistake | Parameter or condition to check | When symptoms usually appear | Immediate response |
|---|---|---|---|---|
| Gasping or rapid gill movement during refill | Chlorine exposure or thermal shock | Conditioner dose, chloramine coverage, temperature | During or soon after refill | Add correctly conditioned, temperature-matched water if needed; restore aeration and test water |
| Sudden loss of balance or frantic swimming | Abrupt temperature or chemistry change | Temperature, pH, chlorine, ammonia | Minutes to hours | Test immediately, increase safe aeration, and avoid another full teardown |
| Gasping, clamped fins, hiding, or lethargy the next day | Biological filter damage | Ammonia and nitrite; both should be 0 ppm in an established tank | 24–48 hours | Test first, perform an appropriate conditioned partial change, and restore mature media |
| Cloudy water without distress | Disturbed substrate, debris, or bacterial bloom | Ammonia, nitrite, filter flow | Hours to a few days | Confirm filtration, reduce feeding, and test if cloudiness persists |
| Fish missing after decor movement | Fish trapped behind equipment or decoration | Intake, filter compartment, moved objects | Immediately | Inspect the tank and restore safe circulation |
Cloudy water following a gravel vacuum often stems from floating dust, tiny microbubbles, or stirred-up silt. If haziness lingers or your fish act sluggish, test for ammonia and nitrite immediately. A bacterial bloom creates a milky haze, but never assume cloudiness is harmless if fish are gasping near the surface.
A repeatable fish tank maintenance schedule
Inspect your aquarium weekly. Wipe down glass and clear out decaying matter as needed, running chemical tests whenever livestock behaves unusually, tap water parameters shift, or filtration slows down. Complete a 20–25% partial water change every one to two weeks, adjusting the frequency based on stocking levels, feeding rates, and nitrate readings.
Small betta tanks demand steady upkeep because low water volumes shift rapidly. Stick to the exact same procedure: leave the betta inside, siphon waste gently, avoid raking the entire sand bed, and match fresh water for temperature and conditioner. Never attempt to clean a small tank with dish soap or total water drains.
Run through this quick checklist after every maintenance session:
- ☐ Heater is submerged and safe to restart.
- ☐ Filter is primed, running, and returning water.
- ☐ Surface is rippling and aeration is working.
- ☐ Every replacement gallon received the label-directed conditioner dose.
- ☐ New water was within 1–2°F of the aquarium.
- ☐ Fish are not trapped behind decor or against an intake.
- ☐ Exterior cords and tank surfaces are dry.
- ☐ Feeding is paused for 24 hours if fish are stressed.
- ☐ Fish behavior is normal after five minutes and again after 24 hours.
- ☐ Ammonia and nitrite are tested immediately if distress appears.
Routine aquarium maintenance is about preservation, not restarting from scratch. Leave your fish in place, vacuum up waste, protect your biological media, and refill slowly with conditioned, temperature-matched water. Doing so keeps the aquarium clean while protecting the biological stability your fish need to thrive.

FAQ
Can I use vinegar to clean aquarium equipment?
Plain white vinegar can be used on removable, nonporous equipment for mineral deposits, but the item must be rinsed thoroughly with clean water before returning it to the tank. Never add vinegar directly to an occupied aquarium as a general cleaner.
Why is my fish tank cloudy after a water change?
Temporary cloudiness may come from disturbed substrate, suspended debris, or tiny air bubbles. If it persists or fish appear distressed, test ammonia and nitrite, confirm that the filter is running, and check that the new water was properly conditioned.
Should I clean the tank immediately after a fish dies?
Remove the fish promptly and test ammonia and nitrite before deciding what maintenance is needed. A partial water change may be appropriate, but a full teardown can compound the problem by disrupting biological filtration.
Can I use bottled water for an aquarium water change?
Bottled water is not automatically safer because its mineral content and pH may differ significantly from the aquarium. Stable, conditioned tap water is usually preferable unless source-water testing or a species-specific plan indicates otherwise.